Introduction
Getting a web server running is the easy part. Keeping it secure, fast, and properly configured — that’s where things get interesting. Nginx powers over 33% of websites globally (Netflix and Airbnb included) because it handles heavy traffic without breaking a sweat.
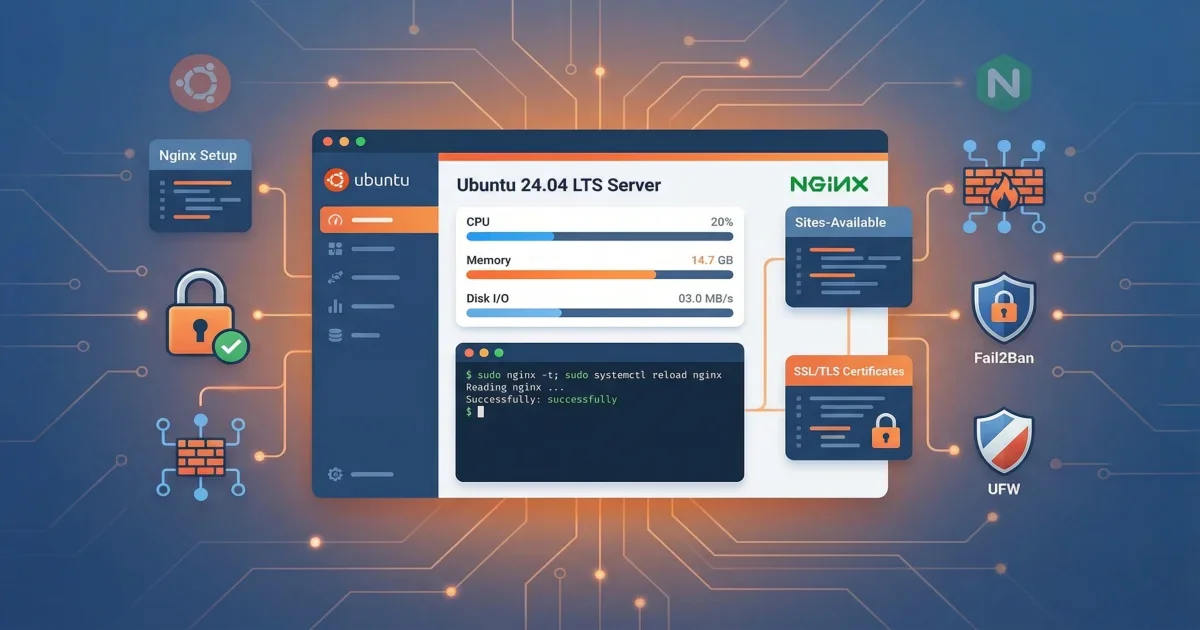
In this tutorial, you’ll set up Nginx on a fresh Ubuntu 24.04 LTS box from scratch. We’re not stopping at “it works” — you’ll walk away with reverse proxy configs, SSL certificates from Let’s Encrypt, and Fail2Ban watching your back against brute force attacks.
What you’ll learn:
- Install Nginx 1.24.0+ on Ubuntu 24.04
- Configure UFW firewall for web traffic
- Set up reverse proxy for backend applications
- Install and configure SSL/TLS certificates
- Protect your server with Fail2Ban
- Implement basic HTTP authentication
Time required: 45 minutes Difficulty level: Intermediate
Prerequisites
Before starting, make sure you have:
- Ubuntu 24.04 LTS server with root or sudo access
- Domain name pointing to your server IP (for SSL setup)
- Basic command line knowledge
- SSH access to your server
Tools needed:
- Terminal or SSH client
- Text editor (nano or vim)
- Domain DNS configured (optional, for SSL)
Step 1: Install Nginx on Ubuntu 24.04
Ubuntu 24.04 includes Nginx 1.24.0 in its official repositories. This version supports HTTP/2, TLS 1.3, and modern security features.
Update your package index first:
sudo apt update
sudo apt upgrade -y
Install Nginx:
sudo apt install nginx -yVerify the installation:
nginx -vExpected output:
nginx version: nginx/1.24.0 (Ubuntu)Check that Nginx is running:
sudo systemctl status nginxYou should see “active (running)” in the output. Nginx starts automatically after installation on Ubuntu 24.04.
Common issues:
- Port 80 already in use: Stop any other web server first with
sudo systemctl stop apache2 - Permission denied: Make sure you’re using sudo for all commands
- Package not found: Run
sudo apt updateagain to refresh package lists
Step 2: Configure UFW Firewall
Ubuntu’s UFW (Uncomplicated Firewall) makes it easy to manage firewall rules. Nginx registers three application profiles during installation.
List available profiles:
sudo ufw app listExpected output:
Available applications:
  Nginx Full
  Nginx HTTP
  Nginx HTTPS
  OpenSSH
The three Nginx profiles are:
- Nginx HTTP: Opens port 80 only (unencrypted traffic)
- Nginx HTTPS: Opens port 443 only (encrypted traffic)
- Nginx Full: Opens both ports 80 and 443
For now, allow HTTP traffic:
sudo ufw allow 'Nginx HTTP'
sudo ufw allow OpenSSH
Enable the firewall if not already active:
sudo ufw enableVerify the rules:
sudo ufw statusExpected output:
Status: active

To                         Action      From
--                         ------      ----
OpenSSH                    ALLOW       Anywhere
Nginx HTTP                 ALLOW       Anywhere
Test your server by visiting http://your_server_ip in a browser. You should see the Nginx welcome page.
Step 3: Configure Nginx Server Blocks
Server blocks (similar to Apache’s virtual hosts) let you host multiple websites on one server. Each site gets its own configuration file.
Create a directory for your website:
sudo mkdir -p /var/www/example.com/htmlSet proper ownership:
sudo chown -R $USER:$USER /var/www/example.com/html
sudo chmod -R 755 /var/www/example.com
Create a test page:
nano /var/www/example.com/html/index.htmlAdd this content:
<!DOCTYPE html>
<html>
<head>
    <title>Welcome to Example.com</title>
</head>
<body>
    <h1>Server block is working!</h1>
    <p>This is example.com on Ubuntu 24.04 with Nginx.</p>
</body>
</html>
Create a server block configuration:
sudo nano /etc/nginx/sites-available/example.comAdd this configuration:
server {
    listen 80;
    listen [::]:80;

    root /var/www/example.com/html;
    index index.html index.htm;

    server_name example.com www.example.com;

    location / {
        try_files $uri $uri/ =404;
    }

    # Security headers
    add_header X-Frame-Options "SAMEORIGIN" always;
    add_header X-Content-Type-Options "nosniff" always;
    add_header X-XSS-Protection "1; mode=block" always;
}
Enable the site by creating a symbolic link:
sudo ln -s /etc/nginx/sites-available/example.com /etc/nginx/sites-enabled/Test the configuration:
sudo nginx -tIf the test passes, reload Nginx:
sudo systemctl reload nginxVisit http://example.com to see your new page.
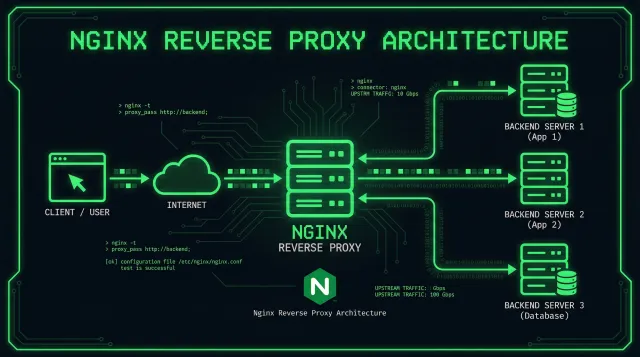
Step 4: Set Up Reverse Proxy
Reverse proxy is one of the most common Nginx use cases. It sits in front of your Node.js, Python, or Java app and handles SSL termination, load balancing, and static file serving — so your app doesn’t have to.
Edit your server block:
sudo nano /etc/nginx/sites-available/example.comAdd a location block for your backend app:
server {
    listen 80;
    server_name example.com www.example.com;

    location / {
        proxy_pass http://localhost:3000;
        proxy_http_version 1.1;
        proxy_set_header Upgrade $http_upgrade;
        proxy_set_header Connection 'upgrade';
        proxy_set_header Host $host;
        proxy_set_header X-Real-IP $remote_addr;
        proxy_set_header X-Forwarded-For $proxy_add_x_forwarded_for;
        proxy_set_header X-Forwarded-Proto $scheme;
        proxy_cache_bypass $http_upgrade;
    }

    # Timeout settings
    proxy_connect_timeout 60s;
    proxy_send_timeout 60s;
    proxy_read_timeout 60s;
}
This configuration:
- Forwards all requests to an app running on port 3000
- Preserves client IP addresses with X-Real-IP header
- Handles WebSocket connections with Upgrade header
- Sets appropriate timeouts for long-running requests
Test and reload:
sudo nginx -t
sudo systemctl reload nginx
Common issues:
- 502 Bad Gateway: Backend app isn’t running on the specified port
- Connection timeout: Increase proxy_read_timeout value
- WebSocket not working: Make sure Upgrade and Connection headers are set
Step 5: Install SSL/TLS Certificates
SSL certificates encrypt traffic between your server and visitors. Let’s Encrypt hands out free certificates that renew themselves — no excuses for running plain HTTP in 2026.
Install Certbot:
sudo apt install certbot python3-certbot-nginx -yBefore requesting a certificate, update your firewall:
sudo ufw delete allow 'Nginx HTTP'
sudo ufw allow 'Nginx Full'
Request a certificate:
sudo certbot --nginx -d example.com -d www.example.comCertbot will ask for your email and agreement to terms. It automatically modifies your Nginx configuration to use HTTPS.
Expected output:
Successfully received certificate.
Certificate is saved at: /etc/letsencrypt/live/example.com/fullchain.pem
Key is saved at: /etc/letsencrypt/live/example.com/privkey.pem
Test automatic renewal:
sudo certbot renew --dry-runCertbot creates a systemd timer that renews certificates automatically. Check the timer status:
sudo systemctl status certbot.timerYour Nginx configuration now includes SSL settings. View the updated file:
sudo cat /etc/nginx/sites-available/example.comYou’ll see new directives like:
listen 443 ssl;
ssl_certificate /etc/letsencrypt/live/example.com/fullchain.pem;
ssl_certificate_key /etc/letsencrypt/live/example.com/privkey.pem;
Step 6: Optimize SSL/TLS Configuration
The default SSL configuration works, but you can improve security and performance with these settings.
Create a shared SSL configuration file:
sudo nano /etc/nginx/snippets/ssl-params.confAdd these optimized settings:
# SSL protocols
ssl_protocols TLSv1.2 TLSv1.3;
ssl_prefer_server_ciphers on;

# Strong cipher suites
ssl_ciphers 'ECDHE-ECDSA-AES128-GCM-SHA256:ECDHE-RSA-AES128-GCM-SHA256:ECDHE-ECDSA-AES256-GCM-SHA384:ECDHE-RSA-AES256-GCM-SHA384:ECDHE-ECDSA-CHACHA20-POLY1305:ECDHE-RSA-CHACHA20-POLY1305';

# Session caching (1MB = ~4000 sessions)
ssl_session_cache shared:SSL:50m;
ssl_session_timeout 1d;
ssl_session_tickets off;

# OCSP stapling
ssl_stapling on;
ssl_stapling_verify on;
resolver 8.8.8.8 8.8.4.4 valid=300s;
resolver_timeout 5s;

# Security headers
add_header Strict-Transport-Security "max-age=31536000; includeSubDomains" always;
add_header X-Frame-Options "SAMEORIGIN" always;
add_header X-Content-Type-Options "nosniff" always;
add_header X-XSS-Protection "1; mode=block" always;
Include this file in your server block:
sudo nano /etc/nginx/sites-available/example.comAdd this line inside the server block that handles port 443:
include snippets/ssl-params.conf;Generate strong Diffie-Hellman parameters:
sudo openssl dhparam -out /etc/ssl/certs/dhparam.pem 2048Add this to your SSL configuration:
ssl_dhparam /etc/ssl/certs/dhparam.pem;Test and reload:
sudo nginx -t
sudo systemctl reload nginx
Test your SSL configuration at SSL Labs. You should get an A or A+ rating.
Step 7: Install and Configure Fail2Ban
Fail2Ban watches your log files for suspicious patterns and automatically bans IPs that misbehave. Think of it as a bouncer for your server — repeat offenders get kicked out.
Install Fail2Ban:
sudo apt install fail2ban -yCreate a local configuration file:
sudo cp /etc/fail2ban/jail.conf /etc/fail2ban/jail.localEdit the configuration:
sudo nano /etc/fail2ban/jail.localFind the [DEFAULT] section and adjust these settings:
[DEFAULT]
# Ban time in seconds (10 minutes)
bantime = 10m

# Time window to count failures (10 minutes)
findtime = 10m

# Number of failures before ban
maxretry = 5

# Your IP (won't be banned)
ignoreip = 127.0.0.1/8 ::1 your_home_ip
Enable the Nginx jails by finding these sections and adding enabled = true:
[nginx-http-auth]
enabled = true
port = http,https
logpath = %(nginx_error_log)s

[nginx-noscript]
enabled = true
port = http,https
logpath = %(nginx_access_log)s

[nginx-badbots]
enabled = true
port = http,https
logpath = %(nginx_access_log)s

[nginx-noproxy]
enabled = true
port = http,https
logpath = %(nginx_access_log)s
Start and enable Fail2Ban:
sudo systemctl start fail2ban
sudo systemctl enable fail2ban
Check the status:
sudo fail2ban-client statusExpected output:
Status
|- Number of jail:      5
`- Jail list:   nginx-badbots, nginx-http-auth, nginx-noproxy, nginx-noscript, sshd
View details for a specific jail:
sudo fail2ban-client status nginx-http-authCheck all currently banned IPs across all jails:
sudo fail2ban-client bannedManually unban an IP if needed:
sudo fail2ban-client set nginx-http-auth unbanip 192.168.1.100Step 8: Set Up Basic HTTP Authentication
For admin panels or staging sites, add password protection with HTTP basic authentication.
Install Apache utilities:
sudo apt install apache2-utils -yCreate a password file:
sudo htpasswd -c /etc/nginx/.htpasswd adminEnter a strong password when prompted. Add more users without the -c flag:
sudo htpasswd /etc/nginx/.htpasswd user2Edit your server block:
sudo nano /etc/nginx/sites-available/example.comAdd authentication to a specific location:
location /admin {
    auth_basic "Restricted Access";
    auth_basic_user_file /etc/nginx/.htpasswd;

    proxy_pass http://localhost:3000;
    proxy_set_header Host $host;
    proxy_set_header X-Real-IP $remote_addr;
}
Test and reload:
sudo nginx -t
sudo systemctl reload nginx
Visit https://example.com/admin and you’ll see a login prompt.
Advanced Tips
Now that you have a working setup, here are some advanced techniques to improve performance and security.
Tip 1: Enable Gzip Compression
Reduce bandwidth usage by compressing responses. Add this to /etc/nginx/nginx.conf in the http block:
gzip on;
gzip_vary on;
gzip_proxied any;
gzip_comp_level 6;
gzip_types text/plain text/css text/xml text/javascript application/json application/javascript application/xml+rss application/atom+xml image/svg+xml;
Tip 2: Configure Rate Limiting
Protect against DDoS attacks with rate limiting. Add this to your http block:
limit_req_zone $binary_remote_addr zone=one:10m rate=10r/s;Then use it in a location:
location /api {
    limit_req zone=one burst=20 nodelay;
    proxy_pass http://localhost:3000;
}
This allows 10 requests per second with a burst of 20.
Tip 3: Set Up Log Rotation
Nginx logs can grow large. Ubuntu includes logrotate configuration, but you can customize it:
sudo nano /etc/logrotate.d/nginxAdjust the rotation settings:
/var/log/nginx/*.log {
    daily
    missingok
    rotate 14
    compress
    delaycompress
    notifempty
    create 0640 www-data adm
    sharedscripts
    postrotate
        if [ -f /var/run/nginx.pid ]; then
            kill -USR1 `cat /var/run/nginx.pid`
        fi
    endscript
}
Common Problems and Solutions
Problem 1: 502 Bad Gateway Error
Solution: This means Nginx can’t connect to your backend application. Check that:
- Your backend app is running:
sudo systemctl status your-app - The port number matches in your proxy_pass directive
- Firewall allows local connections:
sudo ufw allow from 127.0.0.1
Problem 2: SSL Certificate Renewal Fails
Solution: Certbot needs to verify domain ownership. Make sure:
- Port 80 is accessible from the internet
- Your domain DNS points to the correct IP
- No other service is using port 80:
sudo netstat -tlnp | grep :80
Run renewal manually to see errors:
sudo certbot renew --dry-runProblem 3: Fail2Ban Not Banning IPs
Solution: Check that Fail2Ban is monitoring the correct log files:
sudo fail2ban-client get nginx-http-auth logpathVerify the log path matches your Nginx error log location. Check for matches:
sudo fail2ban-regex /var/log/nginx/error.log /etc/fail2ban/filter.d/nginx-http-auth.confProblem 4: Configuration Test Fails
Solution: Nginx configuration syntax is strict. Common mistakes include:
- Missing semicolons at line ends
- Unclosed brackets
- Invalid directive names
Check the error message carefully:
sudo nginx -tThe output shows the exact line number and error type.
Conclusion
Your Nginx server on Ubuntu 24.04 is now locked down and production-ready — SSL encryption, reverse proxy, and Fail2Ban all working together. Not bad for 45 minutes of work.
The setup covers modern TLS protocols, optimized SSL settings, and auto-renewing certificates. Fail2Ban keeps an eye on your logs and blocks bad actors without you lifting a finger. From here, your server can host websites or proxy traffic to backend apps with confidence.
Key takeaways:
- Ubuntu 24.04 includes Nginx 1.24.0 with HTTP/2 and TLS 1.3 support
- UFW firewall provides simple application-based rules
- Let’s Encrypt offers free SSL certificates with automatic renewal
- Fail2Ban protects against brute force attacks by monitoring logs
- Reverse proxy configuration forwards requests to backend apps
Next steps:
- Monitor your logs regularly with
sudo tail -f /var/log/nginx/access.log - Set up monitoring with tools like Netdata or Prometheus
- Configure backup scripts for your Nginx configuration files
- Test your SSL configuration at SSL Labs for an A+ rating
- Explore Nginx modules for additional functionality