Introduction
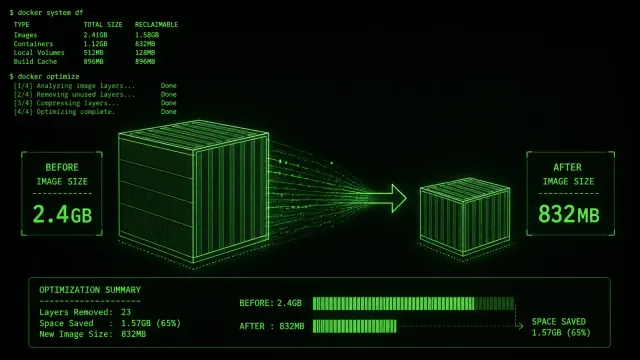
If your Docker images are bloated, slow to push, or ship unnecessary build tools into production, you’re not alone. A typical single-stage Docker image for a Node.js application can easily exceed 1 GB, even though the actual runtime artifacts are just a few megabytes. That’s wasted bandwidth, slower deployments, and a larger attack surface.
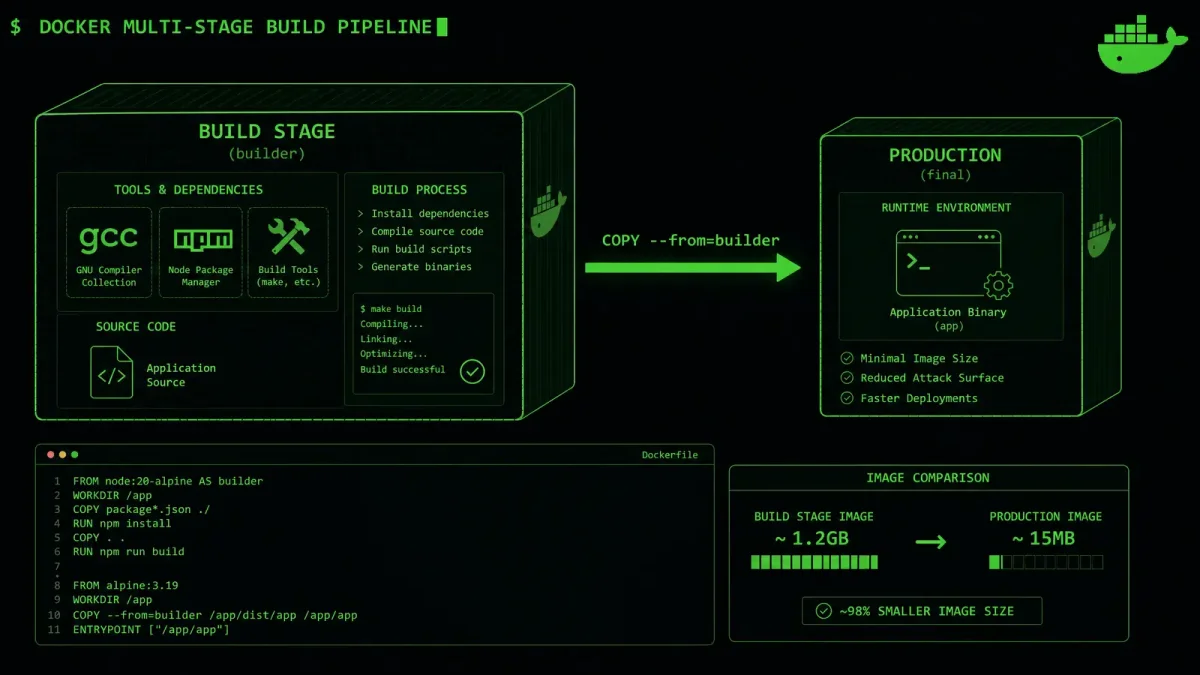
Docker multi-stage builds solve this problem. Instead of maintaining separate Dockerfiles for development and production, you define multiple stages in a single Dockerfile. Each stage has a specific purpose: one for compiling or building your application, another for packaging only what’s needed to run it. The final image contains nothing but your application and its runtime dependencies.
The results are dramatic. Teams report image size reductions of 50% to 98%, faster CI/CD pipelines, and better security postures. Multi-stage builds aren’t an optional optimization anymore, they’re the industry standard for production container images.
In this guide, you’ll learn how multi-stage builds work, see real-world examples for Node.js, Python, and Go, and get a production checklist you can apply to any Dockerfile.
The Problem with Single-Stage Builds
To understand why multi-stage builds matter, let’s look at what happens with a traditional single-stage Dockerfile:
# Single-stage build — everything ends up in the final image
FROM node:20

WORKDIR /app

COPY package.json package-lock.json ./
RUN npm install

COPY . .
RUN npm run build

EXPOSE 3000
CMD ["node", "dist/index.js"]
This approach has three fundamental problems:
1. Image bloat. The node:20 base image includes the full Node.js runtime, npm, build tools, system libraries, and package managers. Your final image carries all of this overhead, easily 1 to 1.5 GB, even though production only needs the compiled JavaScript and the Node runtime.
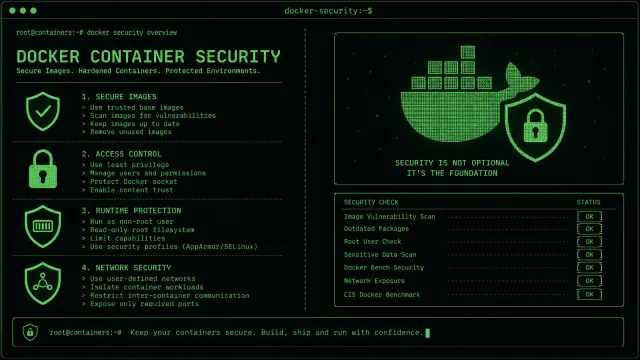
2. Security exposure. Build tools like gcc, make, python, and git are sitting in your production container. If an attacker gains access, they have a full compilation toolchain to work with. Every unnecessary binary is a potential entry point.
3. Slow deployments. Large images take longer to push to registries, pull onto servers, and start up. In a Kubernetes cluster with autoscaling, every extra megabyte translates to slower pod spin-up times during traffic spikes.
How Multi-Stage Builds Work
Multi-stage builds let you use multiple FROM instructions in a single Dockerfile. Each FROM begins a new stage, and you can selectively copy artifacts from one stage to another using COPY --from=<stage>. Only the final FROM stage contributes to the output image.
Here’s the basic pattern:
# Stage 1: Build
FROM node:20-alpine AS builder

WORKDIR /app
COPY package.json package-lock.json ./
RUN npm ci
COPY . .
RUN npm run build

# Stage 2: Production runtime
FROM node:20-alpine AS production

WORKDIR /app
COPY --from=builder /app/dist ./dist
COPY --from=builder /app/node_modules ./node_modules
COPY --from=builder /app/package.json ./

EXPOSE 3000
CMD ["node", "dist/index.js"]
Key points to understand:
AS buildernames the first stage so you can reference it laterCOPY --from=buildercopies only the compiled output and production dependencies into the final stage- The final image contains no source code, no build tools, no devDependencies — just what’s needed to run the application
Even when both stages use the same base image, this pattern is valuable because intermediate build layers (object files, cached packages, temporary downloads) never make it into the final image.
Real-World Examples
Node.js: Full Optimization Pattern
For Node.js projects, you can go further by splitting dependency installation into its own stage for optimal Docker layer caching:
# Stage 1: Install all dependencies (for building)
FROM node:20-alpine AS deps

WORKDIR /app
COPY package.json package-lock.json ./
RUN npm ci

# Stage 2: Build the application
FROM node:20-alpine AS builder

WORKDIR /app
COPY --from=deps /app/node_modules ./node_modules
COPY . .
RUN npm run build

# Stage 3: Production runtime
FROM node:20-alpine AS production

WORKDIR /app

# Create non-root user for security
RUN addgroup -g 1001 -S appgroup && \
    adduser -S appuser -u 1001 -G appgroup

# Copy production dependencies from deps stage
COPY --from=deps /app/node_modules ./node_modules
# Copy built artifacts from builder stage
COPY --from=builder /app/dist ./dist
COPY --from=builder /app/package.json ./

USER appuser

EXPOSE 3000
CMD ["node", "dist/index.js"]
This three-stage pattern delivers several advantages:
- Layer caching: If only your source code changes, Docker reuses the
depsstage cache, skippingnpm cientirely - Dependency separation: The
depsstage installs everything including devDependencies needed for the build, while the production stage only carries what’s required at runtime - Non-root execution: The
appuserruns the application, reducing the impact of any container breakout vulnerability - Alpine base:
node:20-alpineis roughly 50 MB compared to 200+ MB for the full Debian-based image
Typical size reduction: 1.2 GB → 150-200 MB (roughly 85% smaller).
Python: Builder and Slim Runtime
Python images benefit enormously from multi-stage builds because compiled packages (like psycopg2, numpy, or cryptography) require C compilers and development headers during installation — but those tools are useless at runtime.
# Stage 1: Build dependencies and compile packages
FROM python:3.12-slim AS builder

WORKDIR /app

# Install build dependencies
RUN apt-get update && apt-get install -y --no-install-recommends \
    gcc \
    libpq-dev \
    && rm -rf /var/lib/apt/lists/*

# Create virtual environment
RUN python -m venv /opt/venv
ENV PATH="/opt/venv/bin:$PATH"

# Install Python dependencies
COPY requirements.txt .
RUN pip install --no-cache-dir -r requirements.txt

# Stage 2: Production runtime
FROM python:3.12-slim AS production

# Copy the virtual environment from builder
COPY --from=builder /opt/venv /opt/venv
ENV PATH="/opt/venv/bin:$PATH"

WORKDIR /app

RUN groupadd -r appgroup && useradd -r -g appgroup appuser

COPY --chown=appuser:appgroup . .

USER appuser

EXPOSE 8000
CMD ["gunicorn", "--bind", "0.0.0.0:8000", "app:app"]
The key insight here: gcc and libpq-dev are only present in the builder stage. The production image carries the compiled .so files from the virtual environment but none of the build toolchain.
Typical size reduction: 950 MB → 180-250 MB (roughly 75-80% smaller).
Go: Statically Compiled, Near-Zero Runtime
Go is the poster child for multi-stage builds. Since Go produces statically compiled binaries, the runtime stage can use scratch — an empty image with zero overhead.
# Stage 1: Build the Go binary
FROM golang:1.23-alpine AS builder

WORKDIR /app

# Install build dependencies
RUN apk add --no-cache git ca-certificates

# Download dependencies (cached layer)
COPY go.mod go.sum ./
RUN go mod download

# Copy source and build
COPY . .
RUN CGO_ENABLED=0 GOOS=linux go build -ldflags="-w -s" -o /app/server

# Stage 2: Minimal runtime image
FROM scratch

# Add CA certificates for HTTPS
COPY --from=builder /etc/ssl/certs/ca-certificates.crt /etc/ssl/certs/

# Add timezone data if needed
COPY --from=builder /usr/share/zoneinfo /usr/share/zoneinfo

# Copy the binary and non-root user config
COPY --from=builder /app/server /server
COPY --from=builder /etc/passwd /etc/passwd

USER nobody

EXPOSE 8080
ENTRYPOINT ["/server"]
Note the -ldflags="-w -s" flags, which strip debugging symbols and the DWARF symbol table, further reducing binary size. The scratch base image contributes exactly zero bytes.
Typical size reduction: 800 MB → 8-15 MB (roughly 98% smaller). This is the most dramatic example of why multi-stage builds are transformative.
Advanced Patterns
Shared Dependency Stage
When you have multiple services in a monorepo or shared build utilities, create a reusable base stage:
# Shared base with common tools
FROM node:20-alpine AS base

RUN apk add --no-cache curl jq

# Install shared build tools
RUN npm install -g typescript@5.4 @types/node

# Frontend build
FROM base AS frontend
WORKDIR /app/frontend
COPY frontend/package.json frontend/package-lock.json ./
RUN npm ci
COPY frontend/ .
RUN npm run build

# Backend build
FROM base AS backend
WORKDIR /app/backend
COPY backend/package.json backend/package-lock.json ./
RUN npm ci
COPY backend/ .
RUN npm run build

# Production
FROM node:20-alpine
WORKDIR /app
COPY --from=frontend /app/frontend/dist ./frontend/dist
COPY --from=backend /app/backend/dist ./backend/dist
CMD ["node", "backend/dist/index.js"]
Build Arguments for Configuration
Use ARG to make stages configurable at build time:
FROM golang:1.23-alpine AS builder

ARG APP_VERSION=dev
ARG BUILD_ENV=production

WORKDIR /app
COPY go.mod go.sum ./
RUN go mod download

COPY . .
RUN CGO_ENABLED=0 GOOS=linux go build \
    -ldflags="-w -s -X main.Version=${APP_VERSION}" \
    -o /app/server

FROM alpine:3.20
COPY --from=builder /app/server /server
ENTRYPOINT ["/server"]
Build with version injection:
docker build --build-arg APP_VERSION=1.2.3 --build-arg BUILD_ENV=production -t myapp:1.2.3 .BuildKit Layer Caching
If you’re using BuildKit (Docker’s modern build engine, enabled by default in Docker 23.0+), use --link for independent layer caching:
FROM node:20-alpine AS builder

WORKDIR /app
COPY --link package.json package-lock.json ./
RUN --mount=type=cache,target=/root/.npm npm ci --cache /root/.npm
COPY --link . .
RUN npm run build
The --mount=type=cache preserves the npm cache across builds without baking it into the image layers. This can cut rebuild times by 60-80% in active development.
Security Benefits
Multi-stage builds provide meaningful security advantages beyond just smaller images.
Reduced Attack Surface
Every binary, library, and tool in your container is a potential vector. A typical single-stage Node.js image includes:
- Full package managers (apt, npm)
- Compilers (gcc, g++)
- Debugging tools (gdb, strace)
- Text editors (vim, nano)
- Network utilities (curl, wget, nmap on some images)
A multi-stage production image contains only your application and its direct runtime dependencies. This is defense in depth — even if an attacker exploits a vulnerability in your application, they have far fewer tools to escalate or pivot.
No Leaked Secrets
If your build process needs to authenticate to a private registry, download licensed dependencies, or access an API, those credentials exist only in the build stage. They never appear in the final image:
FROM node:20-alpine AS builder

WORKDIR /app
COPY package.json ./

# This credential exists only in this stage
ARG NPM_TOKEN
RUN npm config set //registry.npmjs.org/:_authToken=${NPM_TOKEN}
RUN npm ci

# Final stage — no NPM_TOKEN, no registry credentials
FROM node:20-alpine AS production
WORKDIR /app
COPY --from=builder /app/node_modules ./node_modules
COPY --from=builder /app/dist ./dist
CMD ["node", "dist/index.js"]
Even if someone pulls your production image and inspects its layers, the build-time credentials are simply not there.
Easier Vulnerability Scanning
Smaller images mean fewer packages to scan. When you run trivy, grype, or snyk against your images, a multi-stage build produces fewer findings because there are simply fewer components to audit. This isn’t just cosmetic — fewer dependencies means fewer CVEs to track, fewer patches to apply, and faster security reviews.
Production Checklist
Before shipping a multi-stage Dockerfile to production, verify these items:
- Pin base image versions — Never use
latest. Pin to specific versions likenode:20.11-alpineorpython:3.12.2-slimfor reproducible builds - Use slim or Alpine bases for runtime stages — Full Debian/Ubuntu images carry unnecessary overhead
- Run as non-root — Create and use a dedicated user in the final stage (
USER appuser) - Minimize COPY scope — Copy only what the runtime needs, not the entire project directory
- Order layers for cache efficiency — Copy dependency manifests before source code so package installs are cached
- Add a
.dockerignorefile — Exclude.git,node_modules,.env, build artifacts, and IDE files from the build context - Combine RUN commands — Chain related commands with
&&and clean up apt caches in the same layer - Use BuildKit cache mounts — Speed up repeated builds with
--mount=type=cache - Scan the final image — Run a vulnerability scanner against the production image, not just the Dockerfile
- Set resource limits — Use Docker or orchestrator-level memory and CPU limits, even with small images
Troubleshooting
”COPY —from: invalid stage” Error
This usually means you’re referencing a stage name that doesn’t exist. Check that the AS <name> in your FROM line matches exactly, including case sensitivity.
Binary Not Found in Scratch Image
When using FROM scratch, the image has no shell, no libraries, no filesystem structure. If your binary fails with “not found,” it’s likely dynamically linked. Recompile with CGO_ENABLED=0 (for Go) or switch to alpine:3.20 as your runtime base.
npm install Fails in Production Stage
If you’re using a multi-stage build and the production stage needs node_modules, make sure you’re copying from the correct stage. A common mistake is copying from the build stage after npm run build has cleaned up dependencies. Copy from the deps stage instead, or install with npm ci --omit=dev in the production stage.
Image Still Too Large
Run docker image history <image> to see which layers contribute the most size. Common culprits:
- Installing packages without
--no-install-recommends(Debian) or using non-Alpine bases - Copying the entire source tree instead of selective artifacts
- Not cleaning apt caches in the same
RUNcommand that installs packages
Build is Slow on Rebuilds
Enable BuildKit (export DOCKER_BUILDKIT=1) and use cache mounts. Also verify that your .dockerignore file is excluding large directories like .git and node_modules from the build context. A bloated build context gets sent to the Docker daemon on every build, adding significant overhead.
Conclusion
Docker multi-stage builds are one of the highest-impact optimizations you can make to your container workflow. They deliver smaller images, faster deployments, and stronger security, all from a single, maintainable Dockerfile.
The patterns covered in this guide apply to any language or framework. Start with the examples closest to your stack, measure the size reduction, and iterate. The difference between a 1.2 GB image and a 150 MB image isn’t just numbers on a dashboard. It means faster CI pipelines, quicker rollouts during incidents, and a smaller attack surface.
If you’re not using multi-stage builds yet, your next Dockerfile is the perfect place to start.