Every DNS query your server makes travels across the internet to a resolver controlled by someone else — usually your ISP, Google, or Cloudflare. For most people, this is fine. But if you’re running a server, hosting services, or just care about not sending every domain you visit to a third party, running your own DNS resolver gives you control that outsourcing never will.
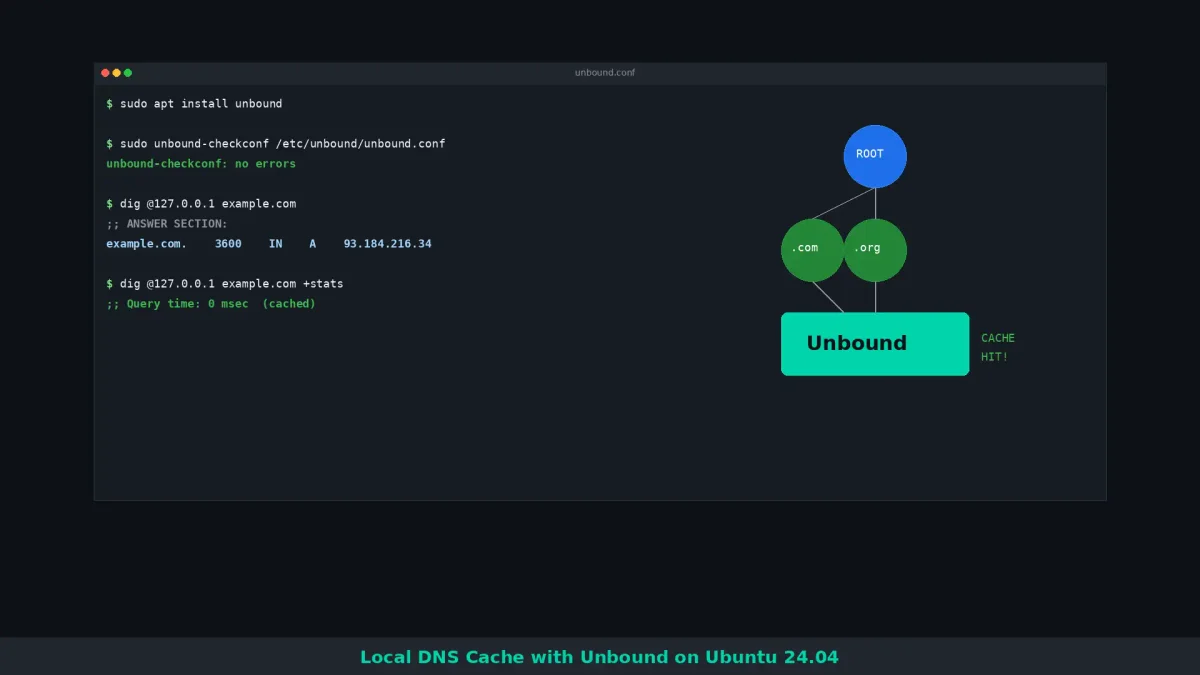
Unbound is a validating, recursive, caching DNS resolver that does exactly what it sounds like: it resolves DNS queries by walking the DNS hierarchy from the root servers down, caches the results, and serves them from memory on subsequent requests. No middleman, no logging by a third party, no dependency on your ISP’s DNS infrastructure staying up.
This guide walks through installing Unbound on Ubuntu 24.04, configuring it for recursive resolution, and tuning it for performance. By the end, you’ll have a local DNS resolver handling all queries for your server or network.
Why run your own DNS resolver
Three reasons matter more than the others.
Privacy. When you use your ISP’s DNS resolver, every domain name your server resolves gets logged somewhere. Most ISPs retain DNS query logs for months or years. Google’s Public DNS and Cloudflare’s 1.1.1.1 have their own privacy policies, but you’re still trusting a third party. With Unbound doing recursive resolution, no external party sees your DNS queries. The only entity that knows what domains your server is looking up is your server.
Performance. Unbound caches DNS responses locally. The first query for a domain takes slightly longer because Unbound has to resolve it recursively, but every subsequent query for that domain (or any domain in its cache) responds in under a millisecond. For servers that make frequent DNS lookups — web servers handling traffic, mail servers resolving sender domains, monitoring systems checking endpoints — the caching adds up to measurable performance improvements.
Independence. If your ISP’s DNS resolver goes down, your server’s DNS resolution stops working. This happens more often than most people realize, and it’s particularly painful for servers where DNS failures cascade into service outages. Running Unbound means your DNS resolution depends on the root DNS servers and TLD servers, which have extremely high uptime, rather than a single upstream resolver.
Installing Unbound
On Ubuntu 24.04, Unbound is available in the default repositories:
sudo apt update
sudo apt install unbound unbound-dev -y
The unbound package includes the resolver itself. The unbound-dev package includes development headers if you want to write custom modules later, but it’s optional.
After installation, Unbound starts automatically. You can verify it’s running:
sudo systemctl status unboundAt this point, Unbound is installed but configured with defaults that won’t do what you want. The default configuration is designed for a local caching resolver that forwards queries to upstream resolvers — which defeats the purpose of running your own. You need to reconfigure it for recursive resolution.
Configuring recursive resolution
The main configuration file is /etc/unbound/unbound.conf. Ubuntu also supports dropping configuration snippets into /etc/unbound/unbound.conf.d/, which is cleaner for custom settings.
Create a configuration file for your recursive resolver:
sudo nano /etc/unbound/unbound.conf.d/recursive.confAdd the following configuration:
server:
    # Listen on localhost only (for server-only use)
    interface: 127.0.0.1
    interface: ::1

    # For network-wide use, also listen on your server's IP:
    # interface: 192.168.1.100

    # Access control
    access-control: 127.0.0.0/8 allow
    access-control: ::1 allow
    # For network-wide use:
    # access-control: 192.168.1.0/24 allow

    # Disable DNSSEC trust anchor (we'll set this up separately)
    auto-trust-anchor-file: "/var/lib/unbound/root.key"

    # Enable prefetching of cached entries before they expire
    prefetch: yes

    # Serve expired responses while refreshing in background
    serve-expired: yes
    serve-expired-ttl: 86400

    # Cache settings
    msg-cache-size: 128m
    rrset-cache-size: 256m
    cache-max-ttl: 86400
    cache-min-ttl: 60

    # Performance tuning
    num-threads: 2
    msg-cache-slabs: 4
    rrset-cache-slabs: 4

    # Privacy: don't send your hostname to upstream
    hide-identity: yes
    hide-version: yes

    # Logging (optional, useful for debugging)
    # verbosity: 1
    # log-queries: yes
    # log-replies: yes

    # Minimize information leakage
    qname-minimisation: yes
Save the file and validate the configuration:
sudo unbound-checkconf /etc/unbound/unbound.confIf the configuration is valid, you’ll see unbound-checkconf: no errors in /etc/unbound/unbound.conf.
Setting up DNSSEC trust anchor
DNSSEC (DNS Security Extensions) protects against DNS spoofing by cryptographically signing DNS records. Unbound can validate DNSSEC signatures, but it needs a trust anchor to start the chain of trust.
Initialize the trust anchor:
sudo unbound-anchor -a /var/lib/unbound/root.keyThis downloads the current trust anchor from IANA and stores it locally. The trust anchor is updated automatically by Unbound’s built-in maintenance mechanism.
Verify the trust anchor was created:
ls -la /var/lib/unbound/root.key
cat /var/lib/unbound/root.key | head -5
You should see a DNSKEY record with a date and key tag.
Starting and testing Unbound
Restart Unbound to apply the new configuration:
sudo systemctl restart unboundVerify it’s running and listening:
sudo systemctl status unbound
ss -tlnp | grep 53
You should see Unbound listening on port 53 on 127.0.0.1 and ::1.
Test DNS resolution:
# Using dig (install with: sudo apt install dnsutils)
dig @127.0.0.1 example.com

# Test a second query (should be faster due to caching)
dig @127.0.0.1 example.com

# Test DNSSEC validation
dig @127.0.0.1 dnssec-failed.org
The first query to example.com might take a few hundred milliseconds as Unbound resolves it recursively. The second query should respond in under 10ms from cache. The DNSSEC test should show a SERVFAIL response, which means Unbound correctly rejected a domain with invalid DNSSEC signatures.
If you want to test that recursive resolution is actually happening (not forwarding to an upstream resolver), check the authority section of the response:
dig @127.0.0.1 example.com | grep -A5 "AUTHORITY SECTION"You should see the TLD server (com.) listed, confirming Unbound resolved from the root.
Configuring your server to use Unbound
Now you need to tell your server to use Unbound instead of the default DNS resolver.
On Ubuntu 24.04, DNS resolution is managed by systemd-resolved. Configure it to use your local Unbound instance:
sudo nano /etc/systemd/resolved.confFind the [Resolve] section and set:
[Resolve]
DNS=127.0.0.1 ::1
FallbackDNS=
#DNSSEC=allow-downgrade
#DNSOverTLS=opportunistic
Setting FallbackDNS= to empty prevents systemd-resolved from using any fallback resolvers. All DNS queries will go through Unbound.
Apply the changes:
sudo systemctl restart systemd-resolvedVerify the configuration:
resolvectl statusThe DNS Servers line should show 127.0.0.1 and ::1.
Test end-to-end:
# This goes through systemd-resolved → Unbound → recursive resolution
ping -c 1 example.com
Monitoring Unbound
Unbound provides statistics that help you understand its behavior and performance. Enable the statistics socket:
Add to your Unbound server configuration:
server:
    # ... existing config ...

    # Statistics
    statistics-interval: 300
    statistics-cumulative: yes
Restart Unbound:
sudo systemctl restart unboundQuery statistics:
# Using unbound-control
sudo unbound-control stats_noreset
Key metrics to watch:
num_queries— total DNS queries receivednum_cachehit— queries answered from cache (higher is better)num_cachemiss— queries that required recursive resolutionnum_prefetch— prefetch events triggeredrrset_cache_count— number of cached resource record sets
A healthy Unbound installation should show a cache hit ratio above 80% after running for a few days, depending on your query patterns.
Tuning for performance
The default configuration works well for most servers, but if your server handles high DNS query volume, a few tweaks help.
Increase cache sizes. The msg-cache-size and rrset-cache-size settings in the configuration above are set to 128MB and 256MB respectively. For a busy server, you can increase these:
msg-cache-size: 256m
rrset-cache-size: 512m
Larger caches mean more entries stay cached, which increases the hit ratio. The tradeoff is memory usage — each 128MB of cache uses roughly 128MB of RAM.
Enable prefetching. The prefetch: yes setting causes Unbound to refresh cached entries before they expire. This means users never experience the latency of a cache miss for frequently accessed domains.
Serve expired responses. The serve-expired: yes setting returns cached entries even after they’ve technically expired, while refreshing them in the background. This keeps response times fast even when TTLs are short.
Tune the number of threads. The num-threads setting should match the number of CPU cores available. On a 4-core server:
num-threads: 4
msg-cache-slabs: 8
rrset-cache-slabs: 8
Using Unbound with Pi-hole
If you’re running Pi-hole for DNS-based ad blocking, Unbound and Pi-hole work well together. Pi-hole handles the filtering, and Unbound handles the recursive resolution. Instead of Pi-hole forwarding queries to an upstream resolver like Google or Cloudflare, it forwards them to your local Unbound instance.
In Pi-hole’s settings, set the custom DNS resolver to 127.0.0.1#5353 (using a different port for Unbound to avoid conflicts):
In Unbound’s configuration, add a listener on port 5353:
server:
    interface: 127.0.0.1@5353
Then in Pi-hole’s settings under DNS, set the custom 1 server to 127.0.0.1#5353.
This gives you ad blocking through Pi-hole with the privacy and performance benefits of a recursive resolver through Unbound.
Securing Unbound
By default, Unbound listens only on localhost, which limits its exposure. But if you configure it to listen on a network interface (for serving other machines on your network), you need to think about access control and hardening.
Restrict access with ACLs. The access-control setting in the configuration determines which networks can send queries to your Unbound instance. Always set this explicitly:
server:
    # Only allow your local network
    access-control: 192.168.1.0/24 allow
    # Block everything else
    access-control: 0.0.0.0/0 refuse
    access-control: ::0 refuse
Never leave access-control open. An open DNS resolver on a public IP becomes an amplifier for DNS amplification attacks, where attackers spoof requests to your resolver and flood victims with large responses.
Limit query rates. Unbound supports rate limiting to prevent abuse:
server:
    # Rate limit: max 15 queries per second per client IP
    ratelimit: 15
    # Slab assignment for rate limiting
    ratelimit-slabs: 4
Disable unwanted record types. If your server doesn’t need to resolve certain DNS record types, disable them to reduce attack surface:
server:
    # Disable DNS amplification vectors
    do-not-query-address: 192.168.1.255
    # Don't resolve private IP addresses
    private-address: 192.168.0.0/16
    private-address: 10.0.0.0/8
    private-address: 172.16.0.0/12
    private-address: 169.254.0.0/16
Monitor for unusual activity. Enable logging temporarily to watch for suspicious query patterns:
server:
    verbosity: 1
    log-queries: yes
    log-replies: yes
    log-servfail: yes
Check logs with:
sudo journalctl -u unbound -fLook for unusual patterns: queries for random subdomains (possible DNS tunneling), high query rates from single IPs, or queries for record types your server never uses.
Using Unbound with Docker containers
If you’re running Docker containers on your server, they typically use Docker’s built-in DNS resolver (127.0.0.11) or fall back to the host’s DNS settings. To route container DNS queries through your Unbound instance, you have two options.
Option 1: Configure Docker’s DNS. Edit the Docker daemon configuration:
sudo nano /etc/docker/daemon.jsonAdd:
{
  "dns": ["127.0.0.1"]
}
Restart Docker:
sudo systemctl restart dockerAll new containers will use Unbound for DNS resolution. Existing containers need to be recreated.
Option 2: Per-container DNS. If you only want specific containers to use Unbound, pass the DNS option when running the container:
docker run --dns 127.0.0.1 --dns 127.0.0.1 my-imageOr in docker-compose:
services:
  my-service:
    image: my-image
    dns:
      - 127.0.0.1
Note: When containers use 127.0.0.1 as their DNS server, they’re referring to their own loopback address, not the host’s. For containers to reach the host’s Unbound instance, use host.docker.internal (with --add-host=host.docker.internal:host-gateway) or the host’s actual IP address on the Docker bridge network.
For a docker-compose setup with Unbound running on the host:
services:
  my-service:
    image: my-image
    extra_hosts:
      - "dns-server:host-gateway"
    dns:
      - 172.17.0.1  # Docker bridge gateway (host)
If your Docker setup uses a custom bridge network with a different subnet, find the gateway IP with docker network inspect bridge and use that address instead.
One practical consideration: Docker’s internal DNS resolver (127.0.0.11) handles container-to-container name resolution. If you override DNS entirely with your Unbound address, containers won’t be able to reach each other by service name in docker-compose networks. The solution is to keep Docker’s default DNS for internal resolution and add Unbound as a secondary resolver, or configure Unbound with a forwarding zone for your Docker network’s internal domains.
Troubleshooting
Unbound fails to start. Check the configuration syntax:
sudo unbound-checkconf /etc/unbound/unbound.confCommon issues include duplicate settings, typos in YAML indentation, or referencing files that don’t exist.
DNS resolution is slow. The first query for any domain will be slow because Unbound has to resolve it recursively. Subsequent queries should be fast. If all queries are slow, check that the root hints file exists:
ls -la /var/lib/unbound/root.hintsIf it’s missing, download it:
sudo wget -O /var/lib/unbound/root.hints https://www.internic.net/domain/named.rootQueries return SERVFAIL. This usually means DNSSEC validation is failing. Check the trust anchor:
sudo unbound-anchor -a /var/lib/unbound/root.key
sudo systemctl restart unbound
If you don’t need DNSSEC validation, you can disable it by removing the auto-trust-anchor-file line from your configuration.
Port 53 conflict. If another service (like systemd-resolved) is already listening on port 53, Unbound can’t bind to it. Either stop the conflicting service or configure Unbound to listen on a different port.