Introduction
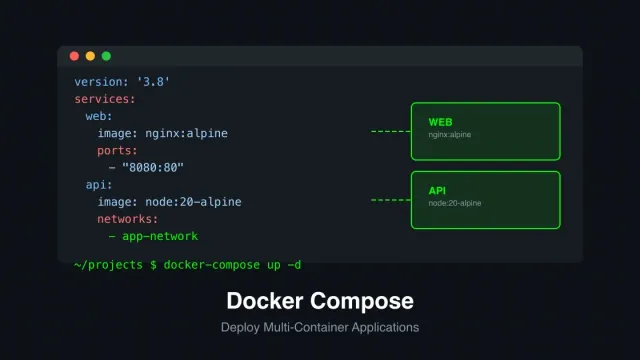
Containerization has fundamentally changed how developers build, ship, and run applications. Docker made containers accessible to everyone, but managing multi-container applications quickly becomes complex when you need to coordinate multiple services, networks, and volumes. Docker Compose solves this problem by letting you define your entire application stack in a single YAML file and launch everything with one command.
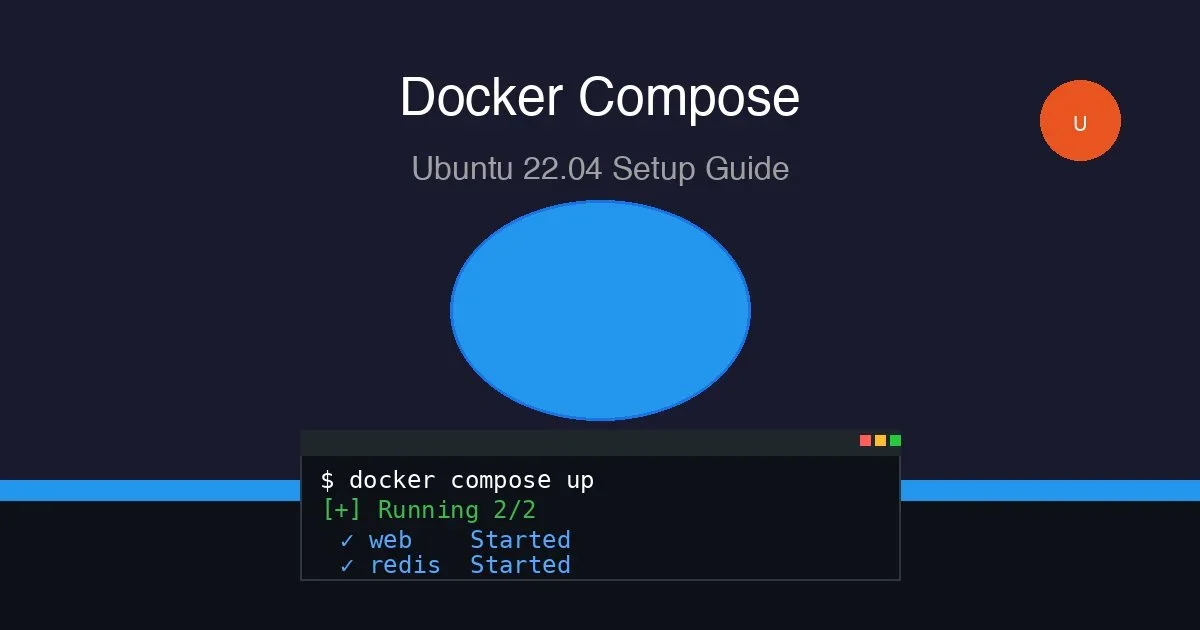
This guide walks you through setting up Docker Compose on Ubuntu 22.04. Whether you’re building a simple web application with a database backend or orchestrating a microservices architecture, you’ll learn the essential skills to manage containerized environments effectively. By the end of this tutorial, you’ll be able to spin up complex multi-container applications with confidence.
The tutorial assumes you have basic familiarity with the Linux command line and understand what Docker containers are at a high level. No prior Docker Compose experience is required.
Why Use Docker Compose?
Docker Compose brings several compelling advantages to container-based development workflows. Understanding these benefits helps you decide when and how to use the tool effectively.
Declarative Configuration: Instead of running dozens of docker run commands with various flags, you describe your desired state in a YAML file. The file serves as both documentation and executable infrastructure code. Your team can review the configuration, version it alongside your application code, and reproduce identical environments across development, testing, and production.
Simplified Orchestration: When your application requires multiple containers working together, Docker Compose manages the startup order, network connections, and dependency handling automatically. The tool ensures that databases start before applications that depend on them, and it creates isolated networks where containers can communicate securely.
Rapid Development: Docker Compose eliminates the “it works on my machine” problem. New team members can clone a repository and run a single command to have a fully functional development environment. This consistency accelerates onboarding and reduces environment-related bugs.
Easy Cleanup: When you’re done testing, a single command removes all containers, networks, and volumes associated with your project. This cleanup prevents orphaned resources from consuming disk space and keeps your development environment tidy.
Prerequisites
Before you begin the installation process, ensure your Ubuntu 22.04 system meets these requirements:
- A fresh Ubuntu 22.04 installation or virtual machine with sudo access
- At least 2GB of RAM and 20GB of disk space
- A non-root user account with sudo privileges
- Basic familiarity with terminal commands
- Docker already installed on your system
If you haven’t installed Docker yet, you’ll need to complete that step first. Docker Compose requires Docker as its underlying runtime.
Step 1: Install Docker on Ubuntu 22.04
Before installing Docker Compose, ensure Docker is properly installed on your Ubuntu system. This section covers the complete Docker installation process from start to finish.
First, update your package index to ensure you have the latest information about available packages:
sudo apt updateInstall prerequisites that allow apt to use packages over HTTPS:
sudo apt install -y ca-certificates curl gnupg lsb-releaseAdd Docker’s official GPG key to your system:
sudo mkdir -p /etc/apt/keyrings
curl -fsSL https://download.docker.com/linux/ubuntu/gpg | sudo gpg --dearmor -o /etc/apt/keyrings/docker.gpg
Set up the Docker repository:
echo \
  "deb [arch=$(dpkg --print-architecture) signed-by=/etc/apt/keyrings/docker.gpg] https://download.docker.com/linux/ubuntu \
  $(lsb_release -cs) stable" | sudo tee /etc/apt/sources.list.d/docker.list > /dev/null
Install the Docker Engine, containerd, and Docker Compose plugin:
sudo apt update
sudo apt install -y docker-ce docker-ce-cli containerd.io docker-buildx-plugin docker-compose-plugin
Verify the installation by checking the Docker version:
docker --versionYou should see output similar to:
Docker version 24.0.6, build ed223bcAdd your user to the docker group so you can run Docker commands without sudo:
sudo usermod -aG docker $USERLog out and log back in for the group membership to take effect, or run:
newgrp dockerStep 2: Install Docker Compose
With Docker installed, you now have two options for getting Docker Compose. The docker-compose-plugin package installs compose as a Docker subcommand (docker compose), while the standalone docker-compose package installs it as a separate executable. The plugin approach is recommended for newer installations.
Verify that Docker Compose is available:
docker compose versionYou should see output similar to:
Docker Compose version v2.21.0If the command fails, install the compose plugin manually:
sudo apt install -y docker-compose-pluginTest the installation by running the compose command with the —help flag:
docker compose --helpThis displays all available commands and their descriptions. Take a moment to familiarize yourself with the options, particularly up, down, ps, and logs.
Step 3: Create Your First Docker Compose Project
Now that Docker Compose is installed, let’s create a practical example that demonstrates its capabilities. We’ll set up a simple web application with a Python Flask backend and a Redis cache.
Create a project directory:
mkdir ~/my-compose-app
cd ~/my-compose-app
Create a requirements.txt file for your Python application:
flask
redis
Create the Flask application file:
from flask import Flask
from redis import Redis
import os

app = Flask(__name__)
redis = Redis(host='redis', port=6379)

@app.route('/')
def hello():
    visits = redis.incr('visits')
    return f'Hello from Docker Compose! Visits: {visits}\n'

if __name__ == '__main__':
    app.run(host='0.0.0.0', port=5000)
Create the Docker Compose configuration file:
version: '3.8'

services:
  web:
    build: .
    ports:
      - "5000:5000"
    volumes:
      - .:/code
    environment:
      - FLASK_ENV=development
    depends_on:
      - redis

  redis:
    image: redis:alpine
    volumes:
      - redis-data:/data

volumes:
  redis-data:
Create a Dockerfile for the web service:
FROM python:3.11-slim

WORKDIR /code

COPY requirements.txt .
RUN pip install --no-cache-dir -r requirements.txt

COPY . .

CMD ["python", "app.py"]
Step 4: Build and Run the Application
With all files in place, you can now build and run your multi-container application. The build process creates Docker images for each service that needs building.
Build the images and start the containers:
docker compose up --buildThe —build flag ensures that any changes to your application code are incorporated into the images. On the first run, this downloads the Redis image and builds your Flask application image.
After the build completes, you’ll see output indicating that both services are running. Open a web browser and navigate to http://localhost:5000. Each refresh increments the visit counter stored in Redis, demonstrating that both containers are communicating correctly.
To run the containers in detached mode (background), use:
docker compose up -d --buildCheck the status of your running containers:
docker compose psView the logs for all services:
docker compose logsFollow the logs in real-time:
docker compose logs -fWhen you’re finished testing, stop and remove the containers:
docker compose downThe down command stops and removes the containers but preserves the named volumes. To remove the data volumes as well:
docker compose down -vConfiguration and Advanced Setup
Docker Compose supports many configuration options that let you customize your deployment. Understanding these options helps you create more sophisticated environments.
Environment Variables
You can externalize configuration using environment variables. Create a .env file in your project directory:
POSTGRES_USER=myuser
POSTGRES_PASSWORD=mypassword
POSTGRES_DB=mydb
Reference these variables in your compose file:
services:
  db:
    image: postgres:15
    environment:
      - POSTGRES_USER=${POSTGRES_USER}
      - POSTGRES_PASSWORD=${POSTGRES_PASSWORD}
      - POSTGRES_DB=${POSTGRES_DB}
    volumes:
      - postgres-data:/var/lib/postgresql/data
Multiple Compose Files
For different environments, you can override the base compose file. Create override files for development, staging, and production:
# Development overrides
docker compose -f docker-compose.yml -f docker-compose.dev.yml up
This approach lets you share a base configuration while customizing specific services per environment.
Health Checks
Define health checks to monitor container health:
services:
  web:
    image: nginx:alpine
    healthcheck:
      test: ["CMD", "wget", "-q", "--spider", "http://localhost/"]
      interval: 30s
      timeout: 10s
      retries: 3
      start_period: 5s
Health checks enable proper dependency ordering with depends_on and provide better visibility into service status.
Best Practices
Following established best practices ensures your Docker Compose configurations are maintainable, secure, and efficient.
Use Specific Image Tags: Avoid using the latest tag in production. Specify exact versions to prevent unexpected breaking changes when images are updated. Use latest only for quick experiments.
Implement Proper Secrets Management: For sensitive data like passwords and API keys, use Docker secrets or external secret management tools rather than embedding them in compose files or environment variables.
Configure Resource Limits: Prevent containers from consuming excessive resources by setting memory and CPU limits:
services:
  web:
    image: nginx:alpine
    deploy:
      resources:
        limits:
          cpus: '0.5'
          memory: 256M
Use Named Volumes: Named volumes are preferable to bind mounts for persistent data. They are managed by Docker and work consistently across different host systems.
Keep Compose Files Versioned: Store your compose files in version control alongside your application code. This practice enables reproducible deployments and team collaboration.
Document Your Configuration: Add comments to your compose files explaining complex configurations and non-obvious choices. Future you (and your teammates) will appreciate the clarity.
Troubleshooting Common Issues
Even experienced developers encounter problems with containerized applications. These solutions address the most common issues you might face.
Containers Failing to Start
When containers fail to start, check the logs first:
docker compose logs <service_name>Common causes include port conflicts, missing environment variables, and incorrect volume paths. Ensure no other processes are using required ports and that all required environment variables are defined.
Network Connection Failures
If containers cannot communicate, verify they are on the same network. Docker Compose automatically creates a default network, but custom networks offer more control:
services:
  web:
    networks:
      - app-network
  redis:
    networks:
      - app-network

networks:
  app-network:
    driver: bridge
Data Persistence Issues
Data disappears after running docker compose down. To persist data, use named volumes:
volumes:
  db-data:
And mount them in your services:
services:
  db:
    volumes:
      - db-data:/var/lib/postgresql/data
Build Failures
If your builds fail, ensure your Dockerfile is correct and all required files are in the build context. The build context defaults to the directory containing the compose file.
Conclusion
Docker Compose transforms container management from a complex orchestration task into a straightforward configuration exercise. You now have the skills to install Docker Compose on Ubuntu 22.04, create multi-container applications, manage their lifecycle, and troubleshoot common issues.
The tutorial covered the complete setup process, from installing Docker through running a working multi-container application. The example Flask and Redis application demonstrates the core concepts you’ll use in real-world projects.
As you continue exploring Docker Compose, experiment with more complex configurations. Try adding a reverse proxy with Nginx, incorporate a database like PostgreSQL, or explore multi-environment deployments. The skills you’ve built here provide a foundation for container-based development and deployment that scales from local development through production.
Related Tutorials: