Every Docker container needs a way to talk to other containers, the host machine, or the outside world. Networking makes that happen. But Docker offers several network modes, and picking the wrong one can lead to hours of debugging “connection refused” errors.
This tutorial walks you through each Docker network mode with real commands you can run on your own server. By the end, you will know which mode fits your use case and how to set it up.
Prerequisites
Before you start, make sure you have:
- Docker Engine 20.10 or later installed
- Basic familiarity with the Linux command line
- A Linux server or local machine with Docker running
Check your Docker version:
docker --versionHow Docker Networking Works
When Docker starts on a Linux host, it creates a virtual bridge called docker0. Every new container connects to this bridge by default. The container gets its own network namespace with a virtual Ethernet pair (veth). One end stays inside the container. The other end plugs into the bridge on the host.
This setup gives each container its own IP address, routing table, and DNS configuration. Containers on the same bridge can reach each other by IP. Containers on different networks cannot, unless you connect them.
Docker provides these built-in network drivers:
| Driver | Description | Use Case |
|---|---|---|
| bridge | Isolated network on a single host | Most single-host setups |
| host | Shares the host network stack | High-performance apps |
| none | No networking at all | Security-sensitive workloads |
| overlay | Connects containers across multiple hosts | Docker Swarm clusters |
| macvlan | Assigns a real MAC address to containers | Legacy app integration |
List your current Docker networks:
docker network lsBridge Network: The Default Choice
Bridge is the default network driver. When you run a container without specifying --network, Docker attaches it to the default bridge.
The Default Bridge vs. Custom Bridge
The default bridge has a limitation: containers can only reach each other by IP address, not by name. Custom bridge networks fix this by enabling built-in DNS resolution.
Create a custom bridge network:
docker network create --driver bridge app-networkRun two containers on this network:
docker run -d --name web --network app-network nginx:latest
docker run -d --name api --network app-network node:18-alpine sleep infinity
Now test name-based communication:
docker exec api ping -c 3 webThis works because custom bridge networks include an embedded DNS server that resolves container names to IP addresses.
Custom Subnet Configuration
You can control the IP range for your bridge network:
docker network create \
  --driver bridge \
  --subnet 192.168.100.0/24 \
  --gateway 192.168.100.1 \
  --ip-range 192.168.100.128/25 \
  my-custom-bridge
Assign a fixed IP to a container:
docker run -d \
  --name fixed-ip-app \
  --network my-custom-bridge \
  --ip 192.168.100.150 \
  nginx:latest
When to Use Bridge Networks
- Development environments on a single host
- Microservices that need to communicate locally
- Isolated application stacks
- Testing setups where you want containers separated from the host
Host Network: Maximum Performance
Host mode removes the network isolation between the container and the Docker host. The container uses the host’s IP address and network interfaces directly. No NAT, no port mapping.
Run a container with host networking:
docker run -d --name host-nginx --network host nginx:latestNginx is now accessible on port 80 of your host’s IP address. You do not need -p 80:80 because there is no network translation layer.
Performance Comparison
Host networking eliminates the overhead of the virtual bridge and NAT. For network-heavy applications, this can make a measurable difference:
- Bridge mode: Packets go through veth pair, bridge, and iptables NAT rules
- Host mode: Packets go directly through the host’s network stack
Limitations
- Only works on Linux (on macOS and Windows, Docker runs inside a VM)
- Port conflicts with host services are possible
- No network isolation between the container and host
- You cannot run two containers that bind to the same port
Check for port conflicts before using host mode:
ss -tlnp | grep :80When to Use Host Networks
- Applications that need the lowest possible network latency
- Network monitoring or packet capture tools
- Services that bind to many ports dynamically
- Performance benchmarking
None Network: Complete Isolation
The none driver disables all networking for a container. It only has a loopback interface (127.0.0.1). No communication with other containers or external networks.
docker run -d --name isolated --network none alpine:latest sleep infinityVerify the container has no external access:
docker exec isolated ip addr
# Only shows the loopback interface

docker exec isolated ping -c 1 8.8.8.8
# ping: sendto: Network is unreachable
Practical Example: Secure Data Processing
Run a container that processes sensitive files without any network access:
docker run -d \
  --name secure-processor \
  --network none \
  -v /data/input:/input:ro \
  -v /data/output:/output \
  data-processor:latest
The container reads from /input and writes to /output. No data can leave through the network.
When to Use None Networks
- Batch jobs that only work with local files
- Security-sensitive workloads that must not access the network
- Compliance requirements that mandate full network isolation
Overlay Network: Multi-Host Communication
Overlay networks let containers on different Docker hosts communicate as if they were on the same local network. This is the networking backbone of Docker Swarm.
Setting Up an Overlay Network
First, initialize Docker Swarm on your manager node:
docker swarm init --advertise-addr <MANAGER-IP>Join worker nodes:
docker swarm join --token <TOKEN> <MANAGER-IP>:2377Create an overlay network:
docker network create \
  --driver overlay \
  --subnet 10.0.0.0/24 \
  my-overlay
Deploying Services
docker service create \
  --name web \
  --network my-overlay \
  --replicas 3 \
  nginx:latest

docker service create \
  --name api \
  --network my-overlay \
  --replicas 2 \
  node:18-alpine
The web service can reach api by name, even when replicas run on different hosts.
Encrypted Overlay Networks
Enable IPsec encryption for sensitive traffic:
docker network create \
  --driver overlay \
  --opt encrypted \
  secure-overlay
All container-to-container traffic on this network is encrypted automatically.
When to Use Overlay Networks
- Docker Swarm deployments across multiple servers
- Microservices that span several hosts
- High-availability setups with service replication
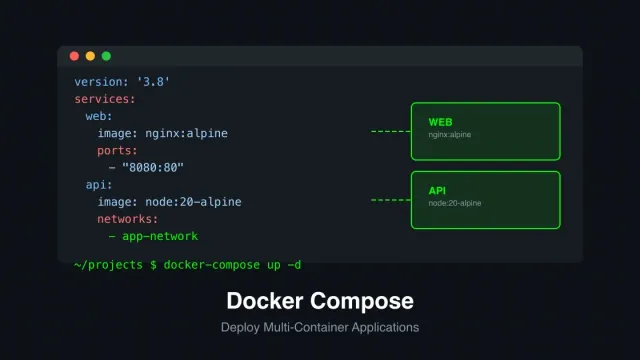
Docker Compose Networking
Docker Compose creates a default network for each project automatically. All services in a docker-compose.yml file can reach each other by service name.
services:
  frontend:
    image: nginx:latest
    networks:
      - frontend-net
    ports:
      - "80:80"

  api:
    image: node:18-alpine
    networks:
      - frontend-net
      - backend-net

  database:
    image: postgres:16
    networks:
      - backend-net
    environment:
      POSTGRES_PASSWORD: secret

networks:
  frontend-net:
  backend-net:
In this setup:
frontendandapisharefrontend-net, so the Nginx container can proxy requests toapiapianddatabasesharebackend-net, so the API can query Postgres atdatabase:5432frontendcannot reachdatabasedirectly, which improves security
This pattern of network segmentation keeps your database isolated from public-facing services.
Networking Best Practices
1. Always use custom bridge networks. The default bridge lacks DNS resolution and provides less isolation. Create a named network for each application stack.
2. Segment your networks by tier. Put frontend, backend, and database containers on separate networks. Connect only the services that need to talk to each other.
3. Expose only the ports you need. Every open port is a potential attack surface. Use -p carefully and avoid -P (which publishes all exposed ports).
# Good: only expose port 80
docker run -d -p 80:80 --network app-net nginx:latest

# Avoid: exposes all ports defined in the Dockerfile
docker run -d -P --network app-net nginx:latest
4. Use DNS names instead of IP addresses. Container IPs can change when containers restart. Service names on custom networks are stable and reliable.
5. Monitor network traffic. Use docker stats to watch network I/O:
docker stats --format "table {{.Name}}\t{{.NetIO}}"Troubleshooting Common Issues
Containers Cannot Reach Each Other
Verify both containers are on the same network:
docker network inspect app-networkLook for both container names in the Containers section. If one is missing, connect it:
docker network connect app-network <container-name>DNS Resolution Fails
This happens on the default bridge network, which does not support name resolution. Move your containers to a custom network:
docker network create my-net
docker network connect my-net <container-name>
Check the DNS config inside a container:
docker exec <container-name> cat /etc/resolv.confContainer Cannot Access the Internet
Check if IP forwarding is enabled on the host:
sysctl net.ipv4.ip_forwardIf the value is 0, enable it:
sudo sysctl -w net.ipv4.ip_forward=1Also verify that iptables is not blocking traffic:
sudo iptables -L -n -t natQuick Reference
| Task | Command |
|---|---|
| List networks | docker network ls |
| Create bridge network | docker network create my-net |
| Run container on network | docker run --network my-net ... |
| Connect running container | docker network connect my-net <name> |
| Disconnect container | docker network disconnect my-net <name> |
| Inspect network | docker network inspect my-net |
| Remove network | docker network rm my-net |
| Remove unused networks | docker network prune |
Summary
Docker networking controls how containers communicate. The five built-in drivers cover most scenarios:
- Bridge works for single-host setups and is the right default for most projects
- Host gives you raw performance at the cost of isolation
- None locks down containers that should never touch the network
- Overlay connects containers across multiple Docker hosts
- Macvlan makes containers appear as physical devices on your LAN
Start with custom bridge networks for development. Use Docker Compose to define network segmentation in code. Move to overlay networks when you scale to multiple hosts.
For more Docker tutorials, check out our guides on Docker Compose on Ubuntu 22.04, Docker Volume Management, and Docker Security Best Practices.