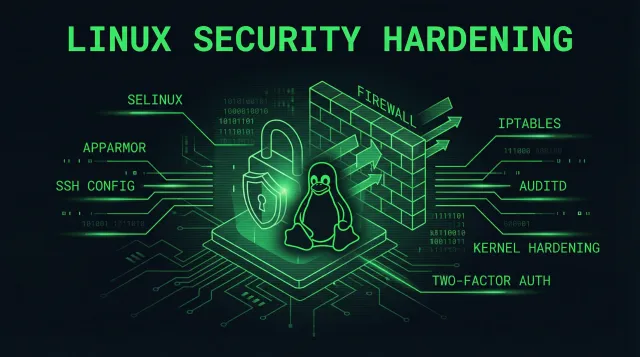
Introduction: Why Server Hardening Matters
In 2025, the average cost of a data breach reached $4.88 million, and 83% of organizations experienced at least one security incident. Most breaches exploit basic security misconfigurations — issues that proper server hardening prevents.
This checklist provides actionable, battle-tested security measures for Linux servers in 2026. Whether you’re securing a web server, database, or container host, these steps form your security foundation.
Time required: 2-3 hours for initial setup Skill level: Intermediate Applicable to: Ubuntu 22.04/24.04, Debian 12, RHEL 9, Rocky Linux, AlmaLinux
Phase 1: Initial Access Security
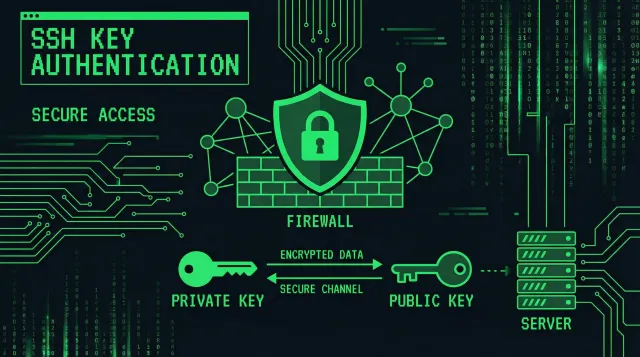
1.1 Secure SSH Access
SSH is the primary attack surface for remote servers. Harden it immediately.
Step 1: Disable root login
# Edit SSH configuration
sudo vim /etc/ssh/sshd_config

# Add or modify these lines:
PermitRootLogin no
PasswordAuthentication no
PubkeyAuthentication yes
AuthenticationMethods publickey
Step 2: Change default SSH port (optional but recommended)
# In /etc/ssh/sshd_config
Port 2222  # Use a non-standard port

# Update firewall rules
sudo ufw allow 2222/tcp
sudo ufw delete allow 22/tcp
Step 3: Configure SSH key authentication
# Generate ED25519 key (more secure than RSA)
ssh-keygen -t ed25519 -C "your_email@example.com"

# Copy to server
ssh-copy-id -p 2222 user@your-server

# Test connection
ssh -p 2222 user@your-server
Step 4: Limit SSH access to specific users
# In /etc/ssh/sshd_config
AllowUsers admin deploy
AllowGroups sshusers
Step 5: Configure fail2ban for SSH
# Install fail2ban
sudo apt install fail2ban  # Debian/Ubuntu
sudo yum install fail2ban  # RHEL/CentOS

# Create jail configuration
sudo tee /etc/fail2ban/jail.d/sshd.local > /dev/null << 'EOF'
[sshd]
enabled = true
port = 2222
filter = sshd
logpath = /var/log/auth.log
maxretry = 3
bantime = 3600
findtime = 600
EOF

# Restart service
sudo systemctl restart fail2ban
1.2 Create Non-Root User with Sudo
# Create new user
sudo adduser admin

# Add to sudo group
sudo usermod -aG sudo admin  # Debian/Ubuntu
sudo usermod -aG wheel admin  # RHEL/CentOS

# Configure sudo with password timeout
sudo visudo

# Add these lines:
Defaults    timestamp_timeout=5
Defaults    logfile="/var/log/sudo.log"
Defaults    log_input, log_output
Defaults    iolog_dir="/var/log/sudo-io"

# Specific user permissions
admin ALL=(ALL:ALL) ALL
1.3 Configure PAM for Account Lockout
# Install pam_tally2 or use pam_faillock (RHEL 8+)
sudo vim /etc/pam.d/common-auth  # Debian/Ubuntu
# Add:
auth required pam_faillock.so preauth deny=5 unlock_time=1800
auth required pam_faillock.so authfail deny=5 unlock_time=1800

# For RHEL/CentOS:
sudo vim /etc/pam.d/system-auth
# Add:
auth required pam_faillock.so preauth deny=5 unlock_time=1800
auth required pam_faillock.so authfail deny=5 unlock_time=1800
Phase 2: Network Security
2.1 Configure UFW Firewall (Ubuntu/Debian)
# Reset and enable UFW
sudo ufw --force reset
sudo ufw default deny incoming
sudo ufw default allow outgoing

# Allow SSH (custom port)
sudo ufw allow 2222/tcp comment 'SSH'

# Allow HTTP/HTTPS for web servers
sudo ufw allow 80/tcp comment 'HTTP'
sudo ufw allow 443/tcp comment 'HTTPS'

# Enable logging
sudo ufw logging on

# Enable firewall
sudo ufw --force enable

# Check status
sudo ufw status verbose
2.2 Configure firewalld (RHEL/CentOS)
# Start and enable firewalld
sudo systemctl start firewalld
sudo systemctl enable firewalld

# Remove default services
sudo firewall-cmd --remove-service=dhcpv6-client --permanent
sudo firewall-cmd --remove-service=ssh --permanent

# Add custom SSH port
sudo firewall-cmd --add-port=2222/tcp --permanent

# Add web services
sudo firewall-cmd --add-service=http --permanent
sudo firewall-cmd --add-service=https --permanent

# Enable logging
sudo firewall-cmd --set-log-denied=all --permanent

# Reload and verify
sudo firewall-cmd --reload
sudo firewall-cmd --list-all
2.3 Disable Unused Network Services
# List all listening services
sudo ss -tulpn

# Identify and disable unnecessary services
sudo systemctl stop avahi-daemon
sudo systemctl disable avahi-daemon

sudo systemctl stop cups
sudo systemctl disable cups

# For each unnecessary service:
sudo systemctl stop <service-name>
sudo systemctl disable <service-name>
2.4 Configure Kernel Network Security
# Create sysctl security configuration
sudo tee /etc/sysctl.d/99-security.conf > /dev/null << 'EOF'
# IP Spoofing protection
net.ipv4.conf.all.rp_filter = 1
net.ipv4.conf.default.rp_filter = 1

# Ignore ICMP broadcast requests
net.ipv4.icmp_echo_ignore_broadcasts = 1

# Disable source packet routing
net.ipv4.conf.all.accept_source_route = 0
net.ipv4.conf.default.accept_source_route = 0
net.ipv6.conf.all.accept_source_route = 0
net.ipv6.conf.default.accept_source_route = 0

# Ignore send redirects
net.ipv4.conf.all.send_redirects = 0
net.ipv4.conf.default.send_redirects = 0

# Block SYN attacks
net.ipv4.tcp_syncookies = 1
net.ipv4.tcp_max_syn_backlog = 2048
net.ipv4.tcp_synack_retries = 2
net.ipv4.tcp_syn_retries = 5

# Log Martians (packets with impossible addresses)
net.ipv4.conf.all.log_martians = 1
net.ipv4.conf.default.log_martians = 1

# Ignore ICMP redirects
net.ipv4.conf.all.accept_redirects = 0
net.ipv4.conf.default.accept_redirects = 0
net.ipv6.conf.all.accept_redirects = 0
net.ipv6.conf.default.accept_redirects = 0
EOF

# Apply settings
sudo sysctl --system
Phase 3: System Hardening
3.1 Update System and Enable Automatic Security Updates
# Update system
sudo apt update && sudo apt upgrade -y  # Debian/Ubuntu
sudo yum update -y  # RHEL/CentOS

# Install unattended-upgrades
sudo apt install unattended-upgrades unattended-upgrades  # Debian/Ubuntu

# Configure automatic updates
sudo dpkg-reconfigure --priority=low unattended-upgrades

# For RHEL/CentOS - install and configure dnf-automatic
sudo yum install dnf-automatic -y
sudo systemctl enable --now dnf-automatic-install.timer
3.2 Remove Unnecessary Software
# List installed packages
dpkg --list  # Debian/Ubuntu
rpm -qa  # RHEL/CentOS

# Remove unnecessary packages
sudo apt remove --purge telnet ftp tftp xinetd nis rsh rlogin -y
sudo apt autoremove -y

# For RHEL/CentOS
sudo yum remove telnet-server ftp-server rsh-server -y
3.3 Configure File System Security
Mount /tmp with noexec:
# Create secure /tmp mount options
sudo tee -a /etc/fstab << 'EOF'
tmpfs /tmp tmpfs defaults,noexec,nosuid,nodev,size=2G 0 0
EOF

# Remount /tmp
sudo mount -o remount /tmp
Disable USB Storage (for servers):
sudo tee /etc/modprobe.d/disable-usb-storage.conf > /dev/null << 'EOF'
install usb-storage /bin/true
blacklist usb-storage
EOF

# Update initramfs
sudo update-initramfs -u  # Debian/Ubuntu
sudo dracut --force  # RHEL/CentOS
3.4 Configure Resource Limits
# Edit limits configuration
sudo vim /etc/security/limits.conf

# Add limits:
* soft core 0
* hard core 0
* soft nofile 65536
* hard nofile 65536
* soft nproc 4096
* hard nproc 4096
3.5 Secure Shared Memory
# Create tmpfs mount for /dev/shm
sudo tee /etc/fstab << 'EOF'
tmpfs /dev/shm tmpfs defaults,noexec,nosuid,nodev 0 0
EOF

# Remount
sudo mount -o remount /dev/shm
Phase 4: Application Security
4.1 Install and Configure AppArmor/SELinux
For AppArmor (Ubuntu/Debian):
# Check status
sudo aa-status

# Install if needed
sudo apt install apparmor apparmor-utils -y

# Enable and start
sudo systemctl enable apparmor
sudo systemctl start apparmor

# Set default profile to enforce mode
sudo aa-enforce /etc/apparmor.d/*
For SELinux (RHEL/CentOS):
# Check status
getenforce
sestatus

# Set to enforcing (edit /etc/selinux/config)
sudo sed -i 's/SELINUX=permissive/SELINUX=enforcing/g' /etc/selinux/config

# Reboot for changes to take effect
sudo reboot
4.2 Configure Audit Logging
# Install auditd
sudo apt install auditd audispd-plugins -y  # Debian/Ubuntu
sudo yum install audit auditd -y  # RHEL/CentOS

# Configure audit rules
sudo tee /etc/audit/rules.d/security.rules > /dev/null << 'EOF'
# Monitor file system mounts
-a exit,always -F arch=b64 -S mount

# Monitor changes to user/group files
-w /etc/passwd -p wa -k identity
-w /etc/group -p wa -k identity
-w /etc/shadow -p wa -k identity
-w /etc/sudoers -p wa -k sudoers

# Monitor SSH configuration
-w /etc/ssh/sshd_config -p wa -k sshd

# Monitor cron
-w /etc/crontab -p wa -k cron
-w /var/spool/cron -p wa -k cron

# Monitor authentication
-w /var/log/auth.log -p wa -k auth_log
-w /var/log/secure -p wa -k auth_log

# Monitor privilege escalation
-a exit,always -F arch=b64 -F euid=0 -F auid!=4294967295 -S execve -k rootcmd
EOF

# Restart auditd
sudo systemctl restart auditd
4.3 Configure System Logging
# Ensure rsyslog is installed and running
sudo systemctl enable rsyslog
sudo systemctl start rsyslog

# Configure log rotation
sudo vim /etc/logrotate.d/rsyslog

# Ensure logs are protected
sudo chmod 640 /var/log/*.log
sudo chown root:adm /var/log/*.log

# Configure remote syslog (optional but recommended)
sudo tee -a /etc/rsyslog.conf << 'EOF'
# Send logs to remote syslog server
*.* @your-syslog-server:514
EOF

sudo systemctl restart rsyslog
Phase 5: Monitoring and Detection
5.1 Install Rootkit Detection Tools
# Install chkrootkit and rkhunter
sudo apt install chkrootkit rkhunter -y  # Debian/Ubuntu
sudo yum install chkrootkit rkhunter -y  # RHEL/CentOS

# Configure rkhunter
sudo vim /etc/rkhunter.conf

# Set:
UPDATE_MIRRORS=1
MIRRORS_MODE=0
WEB_CMD=""

# Update database
sudo rkhunter --update

# Run initial scan
sudo rkhunter --check

# Schedule daily scans
sudo tee /etc/cron.daily/rkhunter << 'EOF'
#!/bin/sh
rkhunter --check --cronjob
EOF

chmod +x /etc/cron.daily/rkhunter
5.2 Configure File Integrity Monitoring
Using AIDE:
# Install AIDE
sudo apt install aide -y  # Debian/Ubuntu
sudo yum install aide -y  # RHEL/CentOS

# Initialize database
sudo aide --init

# Move generated database
sudo mv /var/lib/aide/aide.db.new /var/lib/aide/aide.db

# Schedule daily checks
sudo tee /etc/cron.daily/aide << 'EOF'
#!/bin/sh
aide --check
EOF

chmod +x /etc/cron.daily/aide
5.3 Set Up Security Monitoring
# Install Lynis security auditing tool
sudo apt install lynis -y  # Debian/Ubuntu
# For RHEL/CentOS, add EPEL repo first
sudo yum install lynis -y

# Run security audit
sudo lynis audit system

# Review results
sudo cat /var/log/lynis.log
Phase 6: Backup and Recovery
6.1 Configure Automated Backups
# Install rsync and configure backup script
sudo apt install rsync -y

# Create backup script
sudo tee /usr/local/bin/backup.sh > /dev/null << 'EOF'
#!/bin/bash
BACKUP_DIR="/backup"
DATE=$(date +%Y-%m-%d_%H-%M-%S)
BACKUP_FILE="$BACKUP_DIR/system-$DATE.tar.gz"

# Create backup directory
mkdir -p $BACKUP_DIR

# Backup critical files
tar -czf $BACKUP_FILE \
    /etc \
    /home \
    /var/www \
    /root \
    --exclude=/etc/mtab \
    --exclude=/etc/locks

# Set permissions
chmod 600 $BACKUP_FILE

# Remove backups older than 30 days
find $BACKUP_DIR -name "*.tar.gz" -mtime +30 -delete

echo "Backup completed: $BACKUP_FILE"
EOF

chmod +x /usr/local/bin/backup.sh

# Schedule daily backups
sudo tee /etc/cron.daily/backup << 'EOF'
#!/bin/sh
/usr/local/bin/backup.sh
EOF
6.2 Secure Backup Storage
# Encrypt backups using GPG
sudo gpg --gen-key

# Modify backup script to encrypt
# Add after tar command:
# gpg --encrypt --recipient your-key --output $BACKUP_FILE.gpg $BACKUP_FILE
# rm $BACKUP_FILE
Phase 7: Compliance and Documentation
7.1 Document Security Configuration
Create documentation covering:
- Security baseline: Document all applied hardening measures
- Change management: Log all security-related changes
- Incident response: Define procedures for security incidents
- Access control: Maintain user access documentation
7.2 Regular Security Audits
# Schedule monthly Lynis audits
sudo tee -a /etc/crontab << 'EOF'
0 2 1 * * root /usr/bin/lynis audit system > /var/log/lynis-monthly.log 2>&1
EOF

# Review CIS benchmarks
# Download CIS benchmarks for your distribution
# Run manual compliance checks
Quick Reference: Complete Hardening Script
For reference, here’s a consolidated script for basic hardening:
#!/bin/bash
# Basic Server Hardening Script - Use at your own risk

set -e

echo "Starting server hardening..."

# 1. Update system
apt update && apt upgrade -y

# 2. Install security tools
apt install -y fail2ban rkhunter chkrootkit lynis unattended-upgrades

# 3. Configure SSH
sed -i 's/#PermitRootLogin yes/PermitRootLogin no/' /etc/ssh/sshd_config
sed -i 's/#PasswordAuthentication yes/PasswordAuthentication no/' /etc/ssh/sshd_config
systemctl restart sshd

# 4. Configure UFW
ufw --force reset
ufw default deny incoming
ufw default allow outgoing
ufw allow 2222/tcp
ufw --force enable

# 5. Enable unattended upgrades
dpkg-reconfigure --priority=low unattended-upgrades

# 6. Run Lynis audit
lynis audit system

echo "Hardening complete!"
Maintenance Schedule
| Frequency | Task |
|---|---|
| Daily | Review logs, check fail2ban bans |
| Weekly | Review security alerts, check rkhunter reports |
| Monthly | Run Lynis audit, review user access |
| Quarterly | Full security assessment, update documentation |
| Annually | Complete hardening review, compliance audit |
Summary Checklist
- SSH hardened (key-only, non-root, custom port)
- fail2ban configured
- Firewall enabled with minimal rules
- Automatic updates enabled
- Unnecessary services disabled
- Kernel security parameters configured
- AppArmor/SELinux enabled
- Audit logging configured
- Rootkit detection installed
- File integrity monitoring active
- Backup system operational
- Documentation created
Remember: Security is an ongoing process, not a one-time setup. Regular updates, monitoring, and audits are essential for maintaining a secure server.
Resources: