A default Nginx installation works, but it is not secure. The configuration that ships with most packages leaves your server exposed to version disclosure, weak TLS ciphers, missing security headers, and a handful of other issues that attackers scan for automatically. Hardening Nginx is not optional for production. It is the baseline.
This guide walks through the practical steps to lock down an Nginx server. Each section includes the configuration change, an explanation of what it does, and how to verify it works.
Hide the server version
By default, Nginx sends its version number in HTTP response headers and error pages. An attacker scanning your server can see exactly which version you are running, which makes it easier to find known vulnerabilities.
Fix this by adding one line to your main Nginx configuration file:
# /etc/nginx/nginx.conf
http {
    server_tokens off;
}
After applying, restart Nginx and verify:
curl -I http://your-server-ip/The Server header should now show nginx without a version number. On error pages, the version is also hidden.
This is the simplest hardening step and the one most often skipped. It takes thirty seconds and removes a useful data point for attackers.
Configure modern TLS
TLS configuration is where most of the real security work happens. A weak TLS setup can expose your users to man-in-the-middle attacks, downgrade attacks, and data interception. The good news is that modern TLS is straightforward to configure correctly, and the defaults have improved significantly over the past few years.
Before making any changes, check your current TLS configuration:
nmap --script ssl-enum-ciphers -p 443 your-domain.comThis will show you which protocols and ciphers your server currently supports. If you see TLS 1.0 or 1.1 in the output, those need to go immediately. If you see weak ciphers like RC4, 3DES, or MD5-based suites, those need to go too.
Disable outdated protocols
TLS 1.0 and 1.1 are officially deprecated and have been for years. Major browsers dropped support for them long ago. TLS 1.2 is acceptable but not ideal. For 2026, you should be running TLS 1.3 as your primary protocol with TLS 1.2 as a fallback for older clients.
TLS 1.3 brings meaningful improvements: it removes support for weak cryptographic algorithms, reduces the handshake to a single round trip (or zero round trips for resumption), and eliminates the cipher suite negotiation complexity that plagued earlier versions. If your clients all support TLS 1.3, you can even drop TLS 1.2 entirely for a cleaner configuration.
# /etc/nginx/nginx.conf
http {
    ssl_protocols TLSv1.2 TLSv1.3;
}
Check if your clients support TLS 1.3 by testing from the oldest browser or application that connects to your server. Most modern systems (anything from the last three years) support it without issue.
Set strong cipher suites
Not all ciphers are created equal. Some have known weaknesses that allow attackers to decrypt traffic. The configuration below disables weak ciphers and prioritizes those with forward secrecy, which means that even if an attacker records your traffic today and steals your private key tomorrow, they cannot decrypt the recorded sessions.
Forward secrecy works by using ephemeral key exchanges. Each TLS session generates a unique key that is destroyed after the session ends. Even if someone has your server’s private key, they cannot use it to decrypt past sessions. This is a significant security improvement and is now considered a baseline requirement for any production TLS configuration.
http {
    ssl_ciphers ECDHE-ECDSA-AES128-GCM-SHA256:ECDHE-RSA-AES128-GCM-SHA256:ECDHE-ECDSA-AES256-GCM-SHA384:ECDHE-RSA-AES256-GCM-SHA384;
    ssl_prefer_server_ciphers on;
}
The ssl_prefer_server_ciphers on directive tells Nginx to choose the cipher suite rather than letting the client decide. This prevents clients from negotiating a weaker cipher than the server supports.
Enable OCSP stapling
OCSP stapling improves TLS performance by having the server fetch and cache the certificate status from the certificate authority, rather than requiring each client to check independently. Without stapling, each client must contact the CA’s OCSP server to verify the certificate, which adds latency and creates a privacy concern (the CA knows when you visit the site).
server {
    ssl_stapling on;
    ssl_stapling_verify on;
    resolver 8.8.8.8 8.8.4.4 valid=300s;
    resolver_timeout 5s;
}
Verify OCSP stapling is working:
openssl s_client -connect your-domain.com:443 -statusYou should see OCSP Response Status: successful in the output. If you see OCSP response: no response sent, stapling is not working and you need to check your resolver configuration.
Add security headers
Security headers tell the browser how to handle your content. Without them, your site is vulnerable to clickjacking, MIME sniffing attacks, and other browser-based exploits. The headers below are the minimum set for any production site.
Add these to your Nginx server block:
server {
    # Prevent clickjacking
    add_header X-Frame-Options "SAMEORIGIN" always;

    # Prevent MIME type sniffing
    add_header X-Content-Type-Options "nosniff" always;

    # Enable XSS protection
    add_header X-XSS-Protection "1; mode=block" always;

    # Control referrer information
    add_header Referrer-Policy "strict-origin-when-cross-origin" always;

    # Permissions policy
    add_header Permissions-Policy "camera=(), microphone=(), geolocation=()" always;

    # Content Security Policy (customize for your site)
    add_header Content-Security-Policy "default-src 'self'; script-src 'self' 'unsafe-inline'; style-src 'self' 'unsafe-inline';" always;

    # HSTS (only after confirming HTTPS works)
    add_header Strict-Transport-Security "max-age=63072000; includeSubDomains; preload" always;
}
Each header addresses a specific attack vector. The headers above may look like boilerplate, but each one addresses a specific attack that has been exploited in the wild.
X-Frame-Options prevents your site from being embedded in iframes on other sites, which is how clickjacking attacks work. An attacker embeds your login page in a hidden iframe, tricks the user into clicking on something that appears to be on the attacker’s site, and captures the credentials.
X-Content-Type-Options stops the browser from guessing the content type, which can be exploited to execute malicious files. Without this header, a browser might interpret an uploaded image as JavaScript if the server does not explicitly declare the content type.
The Content-Security-Policy header deserves special attention because it is the most complex and the most powerful. CSP tells the browser which sources of content are trusted. Without it, an attacker who injects a script tag into your page can load code from anywhere. With a properly configured CSP, the browser blocks the injected script because it comes from an unauthorized source. The example CSP above is permissive, allowing inline scripts and styles. A stricter policy would require all scripts to come from specific domains, which is more secure but requires more work to implement.
Strict-Transport-Security (HSTS) tells the browser to only use HTTPS for your domain, preventing downgrade attacks. The max-age of two years is aggressive but appropriate for production. Only enable this after you have confirmed your HTTPS setup works correctly, because browsers will remember the directive for the full duration. The preload directive allows you to submit your domain to the HSTS preload list maintained by browsers, which means even the first visit to your site uses HTTPS.
Implement rate limiting
Rate limiting protects your server from brute force attacks, denial of service attempts, and excessive crawling. Without it, a single attacker can overwhelm your authentication endpoints or exhaust your server resources. It is one of the most effective defenses against automated attacks, and it is surprisingly easy to implement in Nginx.
The key concept is the rate limiting zone. A zone defines a shared memory area where Nginx tracks request counts for each client IP address. The zone name, size, and rate limit are all configurable. The size parameter determines how much memory is allocated, and 10m (10 megabytes) is enough to track approximately 160,000 unique IP addresses.
Define a rate limiting zone in the http block:
http {
    # Limit requests per IP: 10 requests per second
    limit_req_zone $binary_remote_addr zone=general:10m rate=10r/s;

    # Stricter limit for login endpoints: 5 requests per minute
    limit_req_zone $binary_remote_addr zone=login:10m rate=5r/m;
}
Apply the limits to specific location blocks:
server {
    # General rate limiting
    location / {
        limit_req zone=general burst=20 nodelay;
    }

    # Stricter limit on login
    location /login {
        limit_req zone=login burst=3 nodelay;
        proxy_pass http://backend;
    }
}
The burst parameter allows a short spike above the rate limit before enforcing it. The nodelay parameter processes burst requests immediately rather than queuing them. Without nodelay, burst requests are queued and processed at the rate limit speed, which can cause timeouts for legitimate users.
When a request exceeds the rate limit, Nginx returns a 503 error. You can customize this response:
limit_req_status 429;Rate limiting is not a complete security solution, but it eliminates the easiest attack vectors. Combined with fail2ban, it makes brute force attacks impractical. Without rate limiting, an attacker can try thousands of password combinations per minute. With a 5r/m limit on login endpoints, they can try five.
Restrict HTTP methods
Most web applications only need GET, POST, PUT, DELETE, and PATCH. Allowing other methods increases your attack surface. An attacker can use DELETE to remove files, TRACE to detect proxy configurations, or CONNECT to establish tunnels through your server.
server {
    # Allow only common HTTP methods
    if ($request_method !~ ^(GET|HEAD|POST|PUT|DELETE|PATCH)$) {
        return 405;
    }
}
This is a quick win that closes off several attack vectors with minimal configuration. The 405 status code tells the client that the method is not allowed for the requested resource, which is the correct HTTP semantics.
Configure logging for security
Standard Nginx logs record the basics: IP address, request method, URI, status code, and user agent. For security purposes, you should log more. The request body (for POST requests) can reveal injection attempts. The referer shows where traffic is coming from. The response time can indicate resource exhaustion attacks.
A good security-focused log format includes all of these fields plus the upstream response time, which tells you how long your backend took to respond. Slow responses can indicate database attacks, resource exhaustion, or misconfigured backends. Tracking response time in your logs gives you visibility into these issues.
log_format security '$remote_addr - $remote_user [$time_local] '
                    '"$request" $status $body_bytes_sent '
                    '"$http_referer" "$http_user_agent" '
                    '$request_time $upstream_response_time';

access_log /var/log/nginx/access.log security;
Log analysis is a critical part of security monitoring. A properly configured log format gives you the data you need to detect attacks, investigate incidents, and understand traffic patterns.
Consider forwarding logs to a centralized system like the ELK stack or Grafana Loki. Logs stored only on the local server are vulnerable to tampering if the server is compromised. Centralized logging also makes it possible to correlate events across multiple servers, which is essential for detecting distributed attacks.
Set proper file permissions
Nginx needs read access to your website files and write access to log directories. Everything else should be restricted.
# Set ownership
sudo chown -R www-data:www-data /var/www/html

# Set directory permissions
sudo find /var/www/html -type d -exec chmod 755 {} \;

# Set file permissions
sudo find /var/www/html -type f -exec chmod 644 {} \;

# Protect Nginx configuration
sudo chmod 640 /etc/nginx/nginx.conf
sudo chmod 640 /etc/nginx/sites-available/*
The principle is simple: Nginx should only have access to what it needs. A web server process running as root with world-readable configuration files is a liability. Most distributions run Nginx as the www-data user, which limits the blast radius if the server is compromised. If an attacker gains access to the Nginx process, they can only read files owned by www-data, not your system configuration or other users’ data.
Disable unnecessary modules
Every Nginx module you load is code that runs on every request. Modules you do not use are attack surface you do not need.
Check which modules are currently compiled in:
nginx -V 2>&1 | tr ' ' '\n' | grep -- "--"If you see modules you do not use, consider compiling Nginx from source with only the modules you need, or using a distribution that provides a more minimal build. For most users, the default module set is fine, but it is worth reviewing at least once to understand what is running on your server.
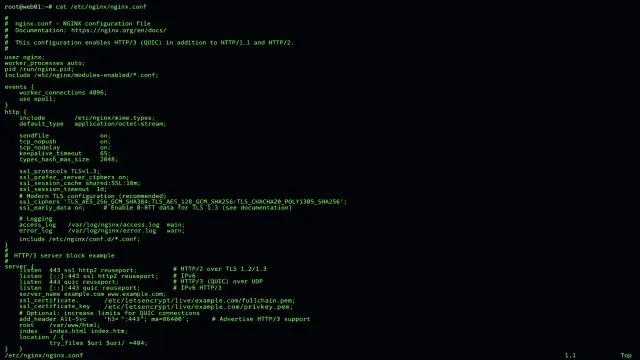
Enable HTTP/2 and HTTP/3
HTTP/2 is a significant performance improvement over HTTP/1.1, and it is supported by every modern browser. HTTP/3, built on QUIC, is the next step and is supported by Chrome, Firefox, and Safari.
server {
    listen 443 ssl http2;
    listen 443 quic reuseport;  # HTTP/3

    add_header Alt-Svc 'h3=":443"; ma=86400';  # Advertise HTTP/3 support
}
HTTP/3 is still relatively new, and enabling it requires Nginx compiled with HTTP/3 support (available in Nginx 1.25+). If your Nginx version does not support it, stick with HTTP/2 for now. Both protocols provide significant performance benefits over HTTP/1.1, including multiplexing multiple requests over a single connection and header compression.
Test your configuration
After making changes, always test before restarting:
sudo nginx -tThis checks the configuration syntax and reports any errors. A syntax error in Nginx configuration will prevent the server from starting, which means downtime. Testing first prevents this.
For security-specific testing, use external tools to verify your configuration:
# Test TLS configuration
nmap --script ssl-enum-ciphers -p 443 your-domain.com

# Test HTTP security headers
curl -I https://your-domain.com/
Tools like SSL Labs and SecurityHeaders.com also provide free online testing that will flag missing headers, weak ciphers, and configuration issues. Run these tests after every significant configuration change to catch regressions.
Where to go from here
These steps cover the most important Nginx hardening measures. They will not make your server bulletproof, but they will eliminate the easy targets and significantly raise the difficulty for attackers.
For ongoing security, consider setting up automatic security updates for Nginx, configuring fail2ban to ban IPs that trigger rate limits or authentication failures, implementing a Web Application Firewall like ModSecurity or Naxsi, regularly reviewing your logs for suspicious patterns, and keeping your TLS certificates current and monitoring their expiration.
Security is not a one-time configuration. It is a process. The hardening steps above are the foundation. The monitoring and maintenance that follow are what keep your server secure over time.