HTTP/3 is no longer experimental. By mid-2026, over 35% of web traffic uses the protocol, and browsers default to HTTP/3 when the server supports it. The underlying transport layer — QUIC — solves real problems that TCP has struggled with for decades, particularly around connection establishment latency and head-of-line blocking.
If you are running Nginx on Ubuntu 24.04, you already have most of the pieces you need. This guide walks through the full configuration from scratch.
What QUIC Actually Changes
TCP has served the web reliably for over forty years. But it was designed for a different era — one where connections were persistent, packet loss was rare, and the network path between client and server did not change mid-session.
QUIC addresses three specific limitations that matter for modern web performance:
Connection establishment. A TCP + TLS 1.3 handshake requires two round trips before any application data flows. QUIC combines the transport and crypto handshakes into a single round trip. For repeat visitors, 0-RTT resumption eliminates the handshake entirely. This is measurable: a typical mobile connection sees 100-200ms of latency per handshake, and QUIC removes that cost.
Head-of-line blocking. With HTTP/2 over TCP, if a single packet is lost, every stream multiplexed on that connection waits for retransmission. QUIC moves multiplexing down to the transport layer itself, so packet loss on one stream does not block others. This matters most for pages loading dozens of resources simultaneously.
Connection migration. QUIC identifies connections by a connection ID rather than the IP address and port tuple. If a mobile device switches from WiFi to cellular mid-session, the connection survives. TCP would have to tear down and rebuild.
These are not theoretical improvements. The performance difference is real and measurable, particularly for users on unreliable networks.
Prerequisites
Before diving into configuration, verify your environment meets the requirements:
Ubuntu 24.04 LTS. This release ships with OpenSSL 3.0+, which includes the QUIC support that Nginx needs. If you are on an older release, you will need to compile OpenSSL from source or upgrade.
Nginx 1.25 or later. HTTP/3 support was stabilized in Nginx 1.25. The version in Ubuntu 24.04’s default repositories may be older, so you will likely need the official Nginx repository. Check your installed version:
nginx -vIf the version is below 1.25, add the Nginx official repository:
sudo apt install curl gnupg2 ca-certificates lsb-release ubuntu-keyring
curl https://nginx.org/keys/nginx_signing.key | gpg --dearmor \
  | sudo tee /usr/share/keyrings/nginx-archive-keyring.gpg >/dev/null
echo "deb [signed-by=/usr/share/keyrings/nginx-archive-keyring.gpg] \
  http://nginx.org/packages/ubuntu $(lsb_release -cs) nginx" \
  | sudo tee /etc/apt/sources.list.d/nginx.list
sudo apt update
sudo apt install nginx
A valid TLS certificate. HTTP/3 requires TLS 1.3, which means you need a certificate. If you do not have one yet, Certbot with Let’s Encrypt takes about five minutes:
sudo apt install certbot python3-certbot-nginx
sudo certbot --nginx -d yourdomain.com -d www.yourdomain.com
Step 1: Verify HTTP/3 Support in Your Nginx Build
Not all Nginx packages include the HTTP/3 module. Before configuring anything, confirm that your build supports it:
nginx -V 2>&1 | grep -o with-http_v3_moduleIf this returns with-http_v3_module, you are good to proceed. If it returns nothing, your Nginx was not compiled with HTTP/3 support and you will need to rebuild from source or find a package that includes it.
Step 2: Configure the Server Block
Open your site’s configuration file. If you used Certbot, this is likely at /etc/nginx/sites-available/yourdomain.com:
sudo nano /etc/nginx/sites-available/yourdomain.comHere is a complete server block configured for HTTP/3:
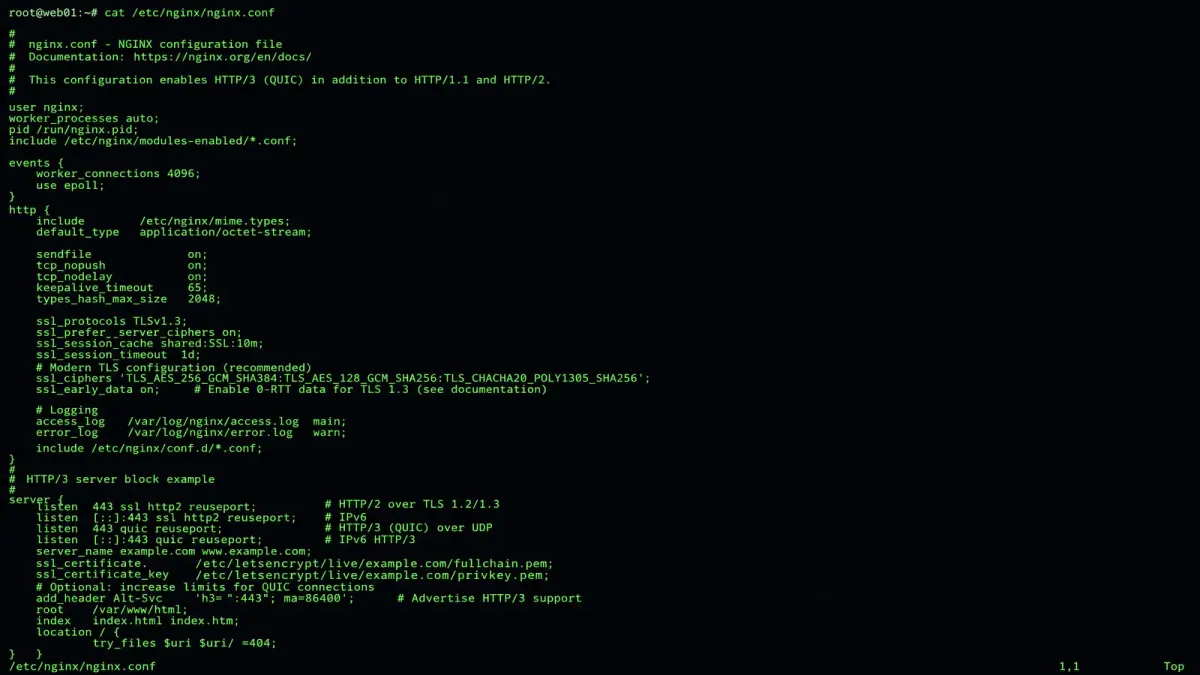
server {
    listen 443 ssl;              # TCP listener for HTTP/1.1 and HTTP/2
    listen 443 quic reuseport;   # UDP listener for HTTP/3
    listen [::]:443 ssl;         # IPv6 TCP
    listen [::]:443 quic reuseport;  # IPv6 UDP
    server_name yourdomain.com www.yourdomain.com;

    root /var/www/yourdomain.com/html;
    index index.html index.htm;

    # SSL certificate paths (set by Certbot)
    ssl_certificate /etc/letsencrypt/live/yourdomain.com/fullchain.pem;
    ssl_certificate_key /etc/letsencrypt/live/yourdomain.com/privkey.pem;

    # TLS 1.3 is mandatory for HTTP/3
    ssl_protocols TLSv1.2 TLSv1.3;
    ssl_ciphers HIGH:!aNULL:!MD5;
    ssl_prefer_server_ciphers on;

    # HTTP/3-specific settings
    http3 on;
    quic_retry on;

    # Advertise HTTP/3 support via Alt-Svc header
    add_header Alt-Svc 'h3=":443"; ma=86400';

    # Security headers
    add_header X-Frame-Options SAMEORIGIN always;
    add_header X-Content-Type-Options nosniff always;
    add_header Strict-Transport-Security "max-age=63072000" always;

    location / {
        try_files $uri $uri/ =404;
    }
}
There are two critical directives here that differ from a standard HTTPS configuration:
The listen 443 quic reuseport; line tells Nginx to accept QUIC connections on UDP port 443. The reuseport parameter allows multiple worker processes to bind to the same port, which improves performance under load.
The add_header Alt-Svc line tells browsers that HTTP/3 is available on port 443. Without this header, browsers will never attempt an HTTP/3 connection, even if the server supports it. The ma=86400 parameter sets the max-age to 24 hours — browsers will remember that HTTP/3 is available and attempt it on subsequent visits.
Step 3: Configure QUIC Retry
QUIC includes a retry mechanism that helps mitigate amplification attacks. The quic_retry on; directive enables this. For high-traffic servers, you may want to fine-tune the retry behavior:
quic_retry on;
# Optional: set the retry token validity period
# quic_retry_timeout 30s;
The retry mechanism works by issuing a token to new clients. The client must return this token in its next connection attempt, proving that it can receive responses at its claimed address. This prevents attackers from using your server to amplify traffic toward a victim.
Step 4: Open UDP Port 443 in Your Firewall
This is the step that catches most administrators. TCP port 443 is almost certainly open — your HTTPS traffic depends on it. But QUIC uses UDP on the same port number, and most firewalls treat TCP and UDP independently.
For UFW (Ubuntu’s default firewall):
sudo ufw allow 443/udp
sudo ufw reload
For iptables:
sudo iptables -A INPUT -p udp --dport 443 -j ACCEPT
sudo iptables-save | sudo tee /etc/iptables/rules.v4
If you are behind a cloud provider’s network firewall (AWS Security Groups, GCP Firewall Rules, Azure NSGs), you need to add a UDP 443 rule there as well. The operating system firewall alone is not sufficient.
Step 5: Test and Verify
After reloading Nginx:
sudo nginx -t
sudo systemctl reload nginx
Verify that Nginx is listening on both TCP and UDP port 443:
sudo ss -tulnp | grep 443You should see entries for both tcp and udp on port 443:
tcp   LISTEN 0 512  0.0.0.0:443  users:(("nginx",pid=1234,fd=6))
udp   UNCONN 0 0    0.0.0.0:443  users:(("nginx",pid=1234,fd=7))
Then test with curl (version 7.88 or later supports HTTP/3):
curl -I --http3 https://yourdomain.comThe response headers should include the alt-svc header:
HTTP/3 200
alt-svc: h3=":443"; ma=86400
content-type: text/html
You can also use online tools like Cloudflare’s HTTP/3 check or the SSL Labs server test, which now includes HTTP/3 verification.
Performance Tuning for HTTP/3
The default QUIC parameters work fine for most workloads, but there are a few tuning options worth considering:
QUIC connection ID length. The default is 8 bytes. Longer IDs (up to 20 bytes) provide better collision resistance for servers with millions of concurrent connections:
quic_host_key /etc/nginx/quic_host.key;Generate the host key:
openssl genpkey -algorithm X25519 -out /etc/nginx/quic_host.keyWorker connections. QUIC connections consume more memory per connection than TCP connections due to the cryptographic state. If you are running a high-traffic server, you may need to adjust:
events {
    worker_connections 2048;
    # Consider increasing worker_rlimit_nofile in the main context
}
GSO (Generic Segmentation Offload). Linux kernel 5.18+ supports GSO for QUIC, which reduces the number of system calls needed to send data:
# In the main context of nginx.conf
quic_gso on;
This can improve throughput by 10-20% on servers with high bandwidth requirements.
Common Issues and Troubleshooting
No UDP response despite correct configuration. The most common cause is a firewall blocking UDP 443. Run tcpdump -i any udp port 443 on the server while making a test request to confirm packets are arriving.
HTTP/3 works in Chrome but not Firefox. Firefox has stricter requirements for QUIC server configuration. Ensure that your TLS certificate chain is complete and that you are not using any deprecated cipher suites.
QUIC retry tokens rejected. This can happen if the server clock is significantly out of sync with the client. Run sudo timedatectl status to check your system time and sudo systemctl restart systemd-timesyncd if needed.
Performance degradation under load. If you see increased latency after enabling HTTP/3, try disabling GSO temporarily to determine whether kernel offload is the issue. Some network drivers have bugs in their GSO implementation.
Should You Enable HTTP/3 Now?
The short answer is yes, with one caveat: make sure your UDP port 443 path is as reliable as your TCP path. HTTP/3’s connection migration feature assumes that the network path is stable. If your hosting provider’s UDP routing is inconsistent, you may see worse performance than HTTP/2.
A practical approach is to enable HTTP/3 alongside HTTP/2 (as shown in the configuration above), monitor your error logs for QUIC-specific issues for a week or two, and then evaluate the performance metrics. The Alt-Svc header means browsers will attempt HTTP/3 when available but fall back to HTTP/2 if it fails, so there is minimal risk to enabling it.
The performance benefits are most noticeable for users on mobile networks and in regions with higher latency. If your audience includes significant mobile or international traffic, HTTP/3 is worth the configuration effort.